Mini Crochet Flower Pots: A Detailed Photo Guide
Crochet Flowers · Mini Pots · Beginner Companion Guide
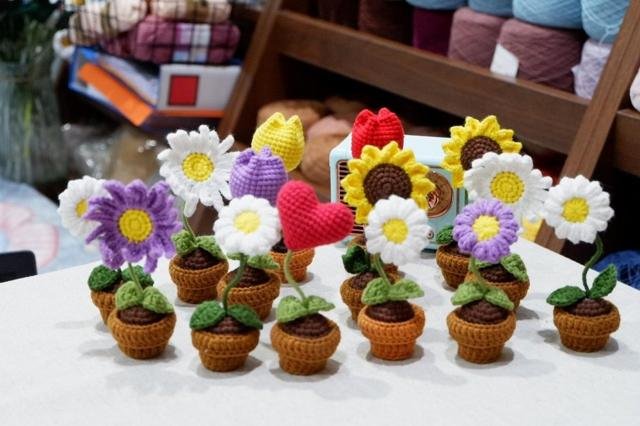
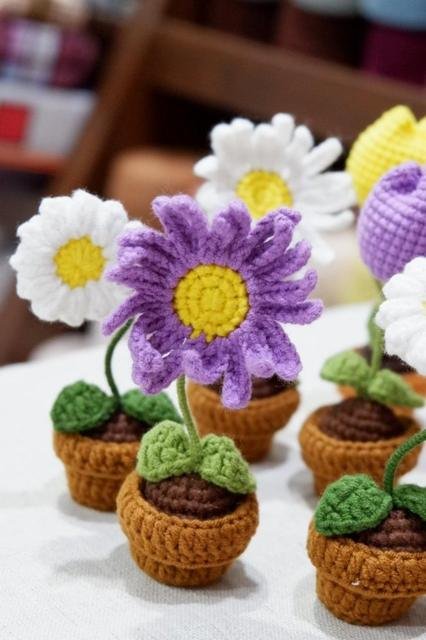
Make a small crochet garden with a tulip, two daisy styles, a sunflower, or a heart-shaped topper. Start with the shared pot, soil insert, leaves, and stem, then choose the flower you want to make.
This guide rewrites and explains the supplied Sunny Princess Crochet pattern in English. The photographs are extracted from that PDF. They show actual reference stages, not generated crochet samples. Where several rounds share one reference photo, those rounds are grouped into one illustrated step.
Original pattern and reference photography: Sunny Princess Crochet. Expanded explanations and layout: Crochet Flowers Tutorial.
Hook: 2.0 mmYarn: 1.5-2 mm cottonReference height: 11-12 cmUS terminologyStitch lessons · Pot · Soil · Leaves and stem · Tulip · Daisy 1 · Daisy 2 · Sunflower · Heart
Materials
- 2.0 mm crochet hook.
- Cotton yarn approximately 1.5-2 mm thick: pot color, dark brown for the soil, green for leaves and stem wrapping, and your chosen flower colors.
- Tapestry needle, scissors, fabric glue or a hot-glue gun.
- Fiberfill.
- Soft wire for the stem; the supplied stem instruction uses a 7 cm piece.
- A removable stitch marker is helpful for spiral rounds.
Follow the wire-supported stem in this source pattern. The wire supports the flower above the pot. Cover the ends and avoid leaving any sharp edge exposed.
Learn the Stitches Before Starting
US terms: sc = single crochet, hdc = half double crochet, dc = double crochet, trb = treble crochet, ch = chain, sl st = slip stitch, MR = magic ring. FLO means front loop only; BLO means back loop only.
Chain and slip knot
Place an adjustable yarn loop on the hook. Yarn over and pull through the loop to make one chain. Repeat for the required number. The loop on the hook is not included in the chain count.
Single crochet
Insert the hook into the stitch, yarn over and pull up a loop. Yarn over and pull through both loops on the hook.
Half double crochet
Yarn over, insert the hook into the stitch and pull up a loop. Yarn over and pull through all three loops.
Double crochet
Yarn over, insert the hook and pull up a loop. Yarn over and pull through two loops, then yarn over and pull through the remaining two.
Slip stitch
Insert the hook into the stated stitch, yarn over and pull through that stitch and the loop on the hook in one movement.
Increase
An sc increase is two sc in the same stitch. An hdc increase is two hdc in the same stitch. A dc increase is two dc in the same stitch. Each increase adds one stitch to the count.
Invisible decrease
Insert the hook under the front loop of the next stitch, then under the front loop of the following stitch. Yarn over and pull through those front loops. Yarn over and pull through the remaining two loops. Two stitches become one.
Magic ring
Make an adjustable yarn ring and work the required stitches around the ring and its tail. Pull the tail to close the center. Follow each component’s joining instructions rather than assuming every round is joined.
Front and back loops
The top of a stitch forms a V. The front loop is the strand nearer you; the back loop is farther from you. For BLO, work under the back strand only. Unless stated otherwise, work under both strands.
Joined rounds versus spiral rounds
The outer pot and several flower centers explicitly join with a slip stitch. The soil, tulip, heart, and other rounds without a stated join follow the source’s spiral-round convention. Place a marker in the first stitch and move it up each round.
A chain-1 or chain-2 lift does not count as a stitch when the pattern says so. Daisy 1 is an exception: its starting chain 2 counts as one hdc. Read that section carefully.
Part 1: Crochet the Outer Pot
The outer pot is called “Detail 1” in the source. Use brown or your preferred color.
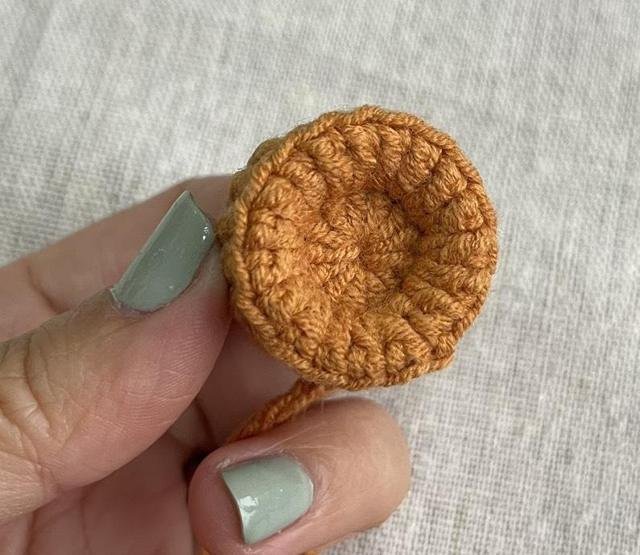
1. Make the Pot Base
Start with a magic ring. Join every round in this pot section as instructed. Round 2 repeats one dc followed by a dc increase six times. Round 3 uses the back loops to create the turn from the flat base to the wall.
| Round / row | Instructions | Count |
|---|---|---|
| 1 | 12 hdc in MR; sl st to join | 12 |
| 2 | Ch 2; (dc, dc inc) × 6; sl st to join | 18 |
| 3 | BLO: ch 1, 18 sc; sl st to join | 18 |
2. Build the Pot Walls
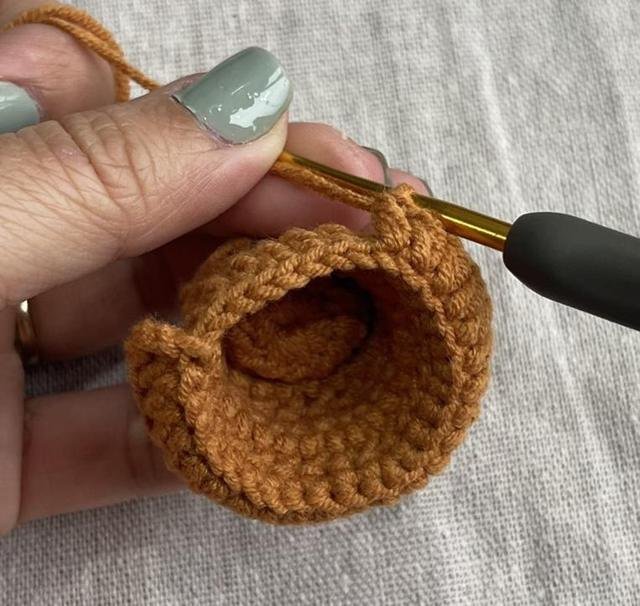
Continue around the pot. The increase rounds widen it; the dc rounds add height. In (2 sc, inc), work one sc in each of two stitches, then two sc in the third stitch.
| Round / row | Instructions | Count |
|---|---|---|
| 4 | Ch 2, 18 dc; sl st to join | 18 |
| 5 | Ch 1; (2 sc, inc) × 6; sl st to join | 24 |
| 6 | Ch 2, 24 dc; sl st to join | 24 |
| 7 | Ch 1; (3 sc, inc) × 6; sl st to join | 30 |
3. Turn and Make the Rim
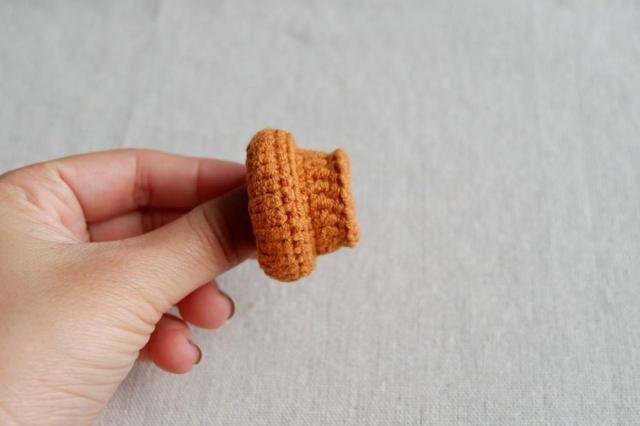
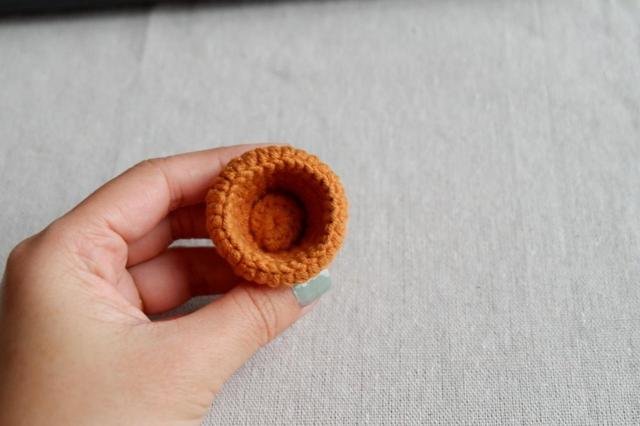
Chain 2 and turn before Round 8. Work its dc stitches in back loops only. Complete Round 9 with sc and join.
| Round / row | Instructions | Count |
|---|---|---|
| 8 | Ch 2, turn; BLO: 30 dc; sl st to join | 30 |
| 9 | Ch 1, 30 sc; sl st to join | 30 |
Part 2: Make the Soil Insert
The stuffed dark-brown insert is “Detail 2.” It sits inside the outer pot.
4. Increase the Soil Insert
Use dark brown and work in a spiral. Keep the marker in the first stitch. Each of the six increase groups adds one stitch to the total.
| Round / row | Instructions | Count |
|---|---|---|
| 1 | 6 sc in MR | 6 |
| 2 | 6 inc | 12 |
| 3 | (sc, inc) × 6 | 18 |
| 4 | 18 sc | 18 |
| 5 | (2 sc, inc) × 6 | 24 |
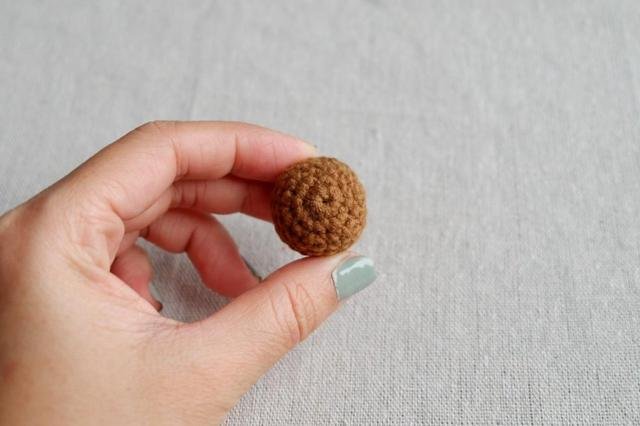
5. Finish and Stuff the Soil Insert
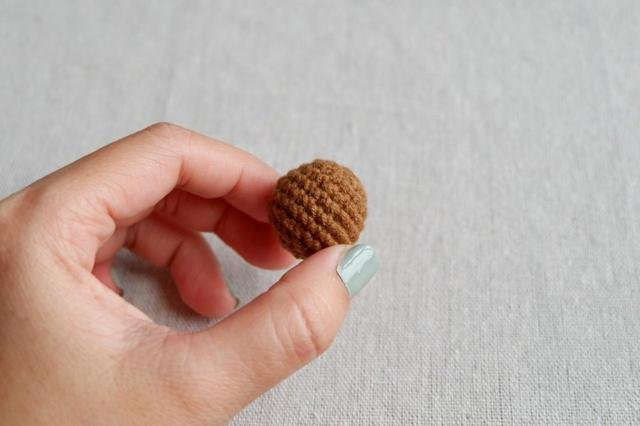
Work two even rounds, then decrease. Add fiberfill after Round 9 while the opening is still accessible. After Round 10, finish stuffing firmly, fasten off and close the remaining opening with the yarn tail.
| Round / row | Instructions | Count |
|---|---|---|
| 6-7 | 24 sc in each round | 24 |
| 8 | (2 sc, dec) × 6 | 18 |
| 9 | (sc, dec) × 6; add fiberfill | 12 |
| 10 | 6 dec; finish stuffing and close | 6 |
Part 3: Crochet the Leaves and Prepare the Stem
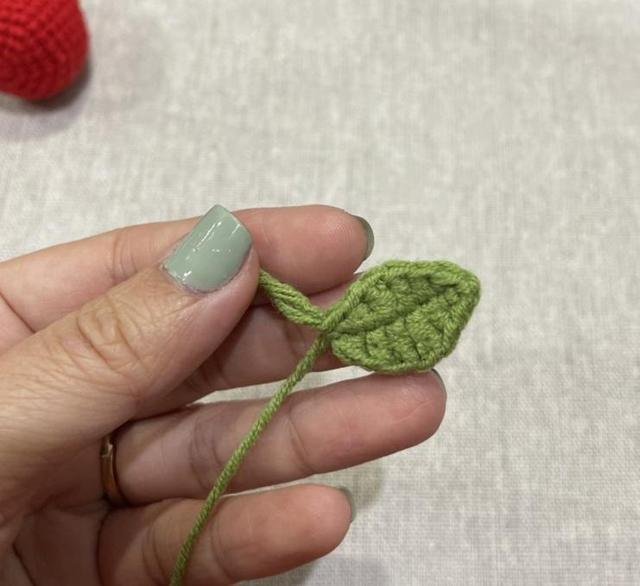
6. Crochet One Leaf
With green yarn, chain 7. Starting in the second chain from the hook, work along one side: sc, hdc, dc, dc, hdc. In the end chain, work sc, chain 2, and sc together. Rotate around the tip and work back along the other side: hdc, dc, dc, hdc, sc. Fasten off and leave a tail for attachment.
Count: 12 worked stitches plus the chain-2 tip. The starting chain is a foundation, not seven worked stitches.
7. Prepare the Leaves for Attachment
Make the leaves you want for your pot arrangement, using the same leaf instructions. Keep their yarn tails available. The source shows a pair but does not impose a separate leaf count for every flower option.
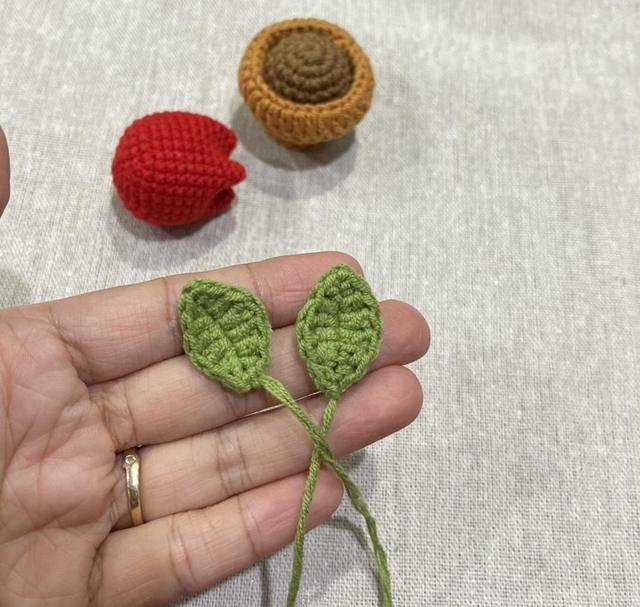
8. Wrap the Stem
The source specifies a 7 cm piece of soft wire. Cover it with green yarn, wrapping closely so the wire does not show. Secure the yarn ends. Cover or tuck the wire tips before attaching the flower and soil insert.
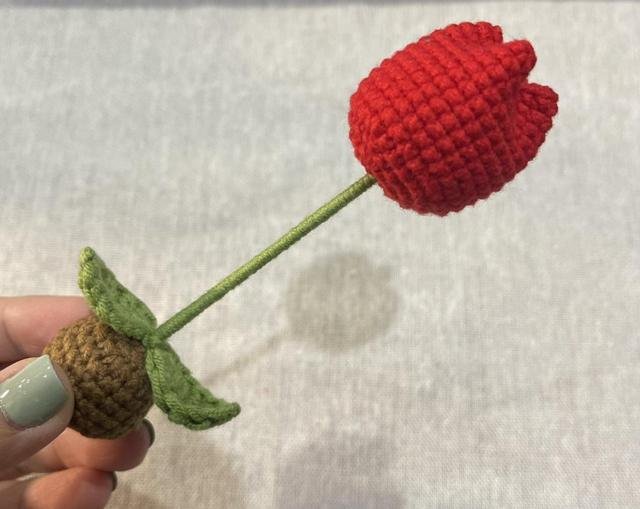
Option A: Tulip
9. Increase the Tulip Cup
Use your chosen tulip color and work in a spiral. Increase in six evenly repeated groups until you reach 30 sc.
| Round / row | Instructions | Count |
|---|---|---|
| 1 | 6 sc in MR | 6 |
| 2 | 6 inc | 12 |
| 3 | (sc, inc) × 6 | 18 |
| 4 | (2 sc, inc) × 6 | 24 |
| 5 | (3 sc, inc) × 6 | 30 |
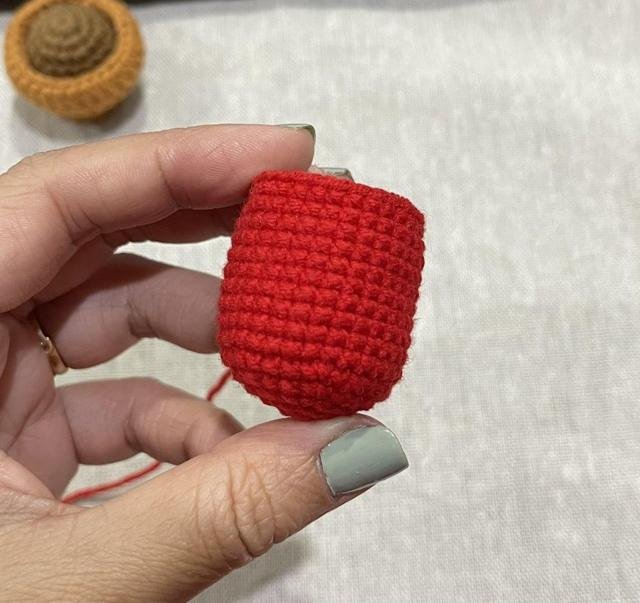
10. Work the Tulip Body and Add Filling
Work 30 sc in each of Rounds 6-15: ten even rounds in total. Add fiberfill without stretching the stitches. Keep the top accessible for shaping and sewing.
| Round / row | Instructions | Count |
|---|---|---|
| 6-15 | 30 sc in every round | 30 |

11. Sew and Shape the Tulip Top
The written pattern says to stuff and sew the top. Follow the reference sequence: bring opposite parts of the top edge together and stitch at the center, then bring the remaining sides toward that center and secure them. Keep the shaping stitches neat and hide the tail.

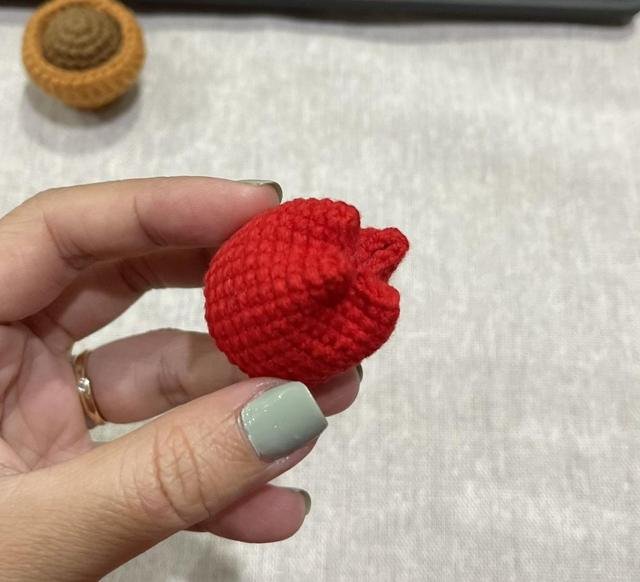
12. Assemble the Tulip Pot
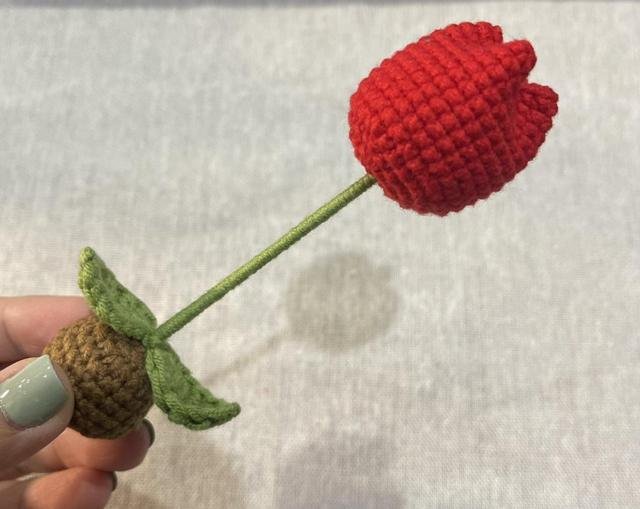
- Attach the wrapped stem to the flower.
- Attach the stem to the dark-brown soil insert.
- Position the leaves on the stem.
- Fit the soil insert into the outer pot and glue the two pot components together.
Use only a little glue at each join and let it set before adjusting the flower.


Option B: Daisy 1 — Popcorn-Style Petals
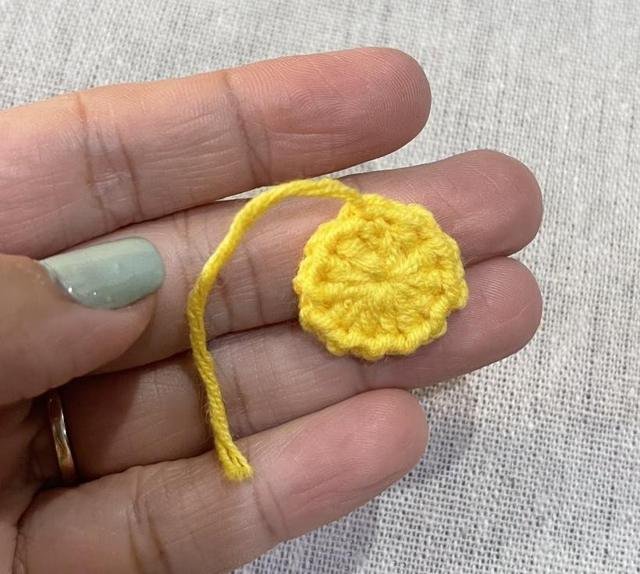
13. Make the Daisy 1 Center
With yellow yarn, make a magic ring. Chain 2: this counts as the first hdc. Repeat (chain 1, hdc) eleven times and join with a slip stitch. The center has 12 hdc. Fasten off and hide the end. The chain spaces are used for the petals.
14. Work One Daisy 1 Petal
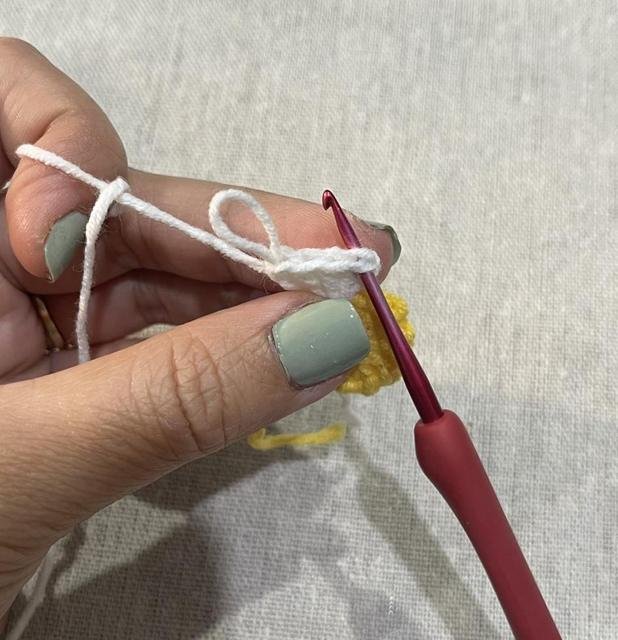
- Join white yarn in a chain-1 space.
- Work four dc in that same space.
- Remove the hook from the working loop.
- Insert the hook into the first dc of the group.
- Pick up the working loop and pull it through that first dc.
- Chain 1 to secure the raised group.

15. Complete the Twelve Daisy 1 Petals
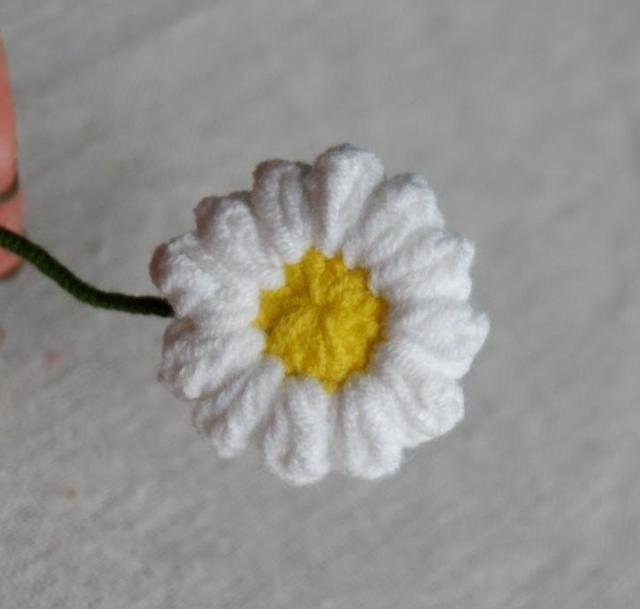
Repeat the same four-dc petal group around the center to make 12 petals, as specified in the source. Check the complete flower against the reference photo and secure the final yarn end. Use a green calyx from the daisy calyx options below before assembling the pot.

Option C: Daisy 2 — Long Narrow Petals
16. Make the Daisy 2 Center
Use yellow and join each round. Round 3 repeats one sc and one increase six times.
| Round / row | Instructions | Count |
|---|---|---|
| 1 | 6 sc in MR; sl st to join | 6 |
| 2 | Ch 1, 6 inc; sl st to join | 12 |
| 3 | Ch 1; (sc, inc) × 6; sl st to join | 18 |

17. Crochet the Eighteen Daisy 2 Petals
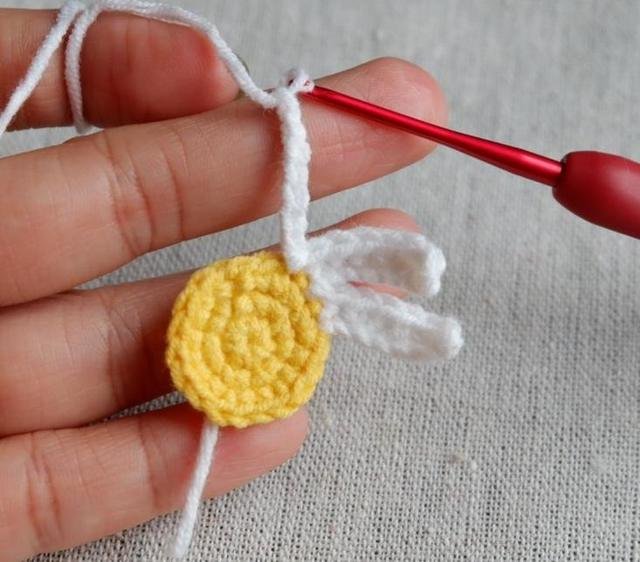
With white yarn, repeat: chain 7; starting in the second chain from the hook, work six sc back along the chain; slip stitch into the next stitch on the center. Repeat eighteen times. Each chain-and-return strip creates one narrow petal. Keep checking that you are moving to the next center stitch.
18. Choose Daisy Calyx Method 1
With green yarn, work the three spiral rounds below. Fasten off and hide the end. This makes a single-crochet backing for the flower.
| Round / row | Instructions | Count |
|---|---|---|
| 1 | 6 sc in MR | 6 |
| 2 | 6 inc | 12 |
| 3 | (sc, inc) × 6 | 18 |

19. Or Choose Daisy Calyx Method 2
This is an alternative, not an extra piece to add on top of Method 1. Work 12 dc into a green magic ring, join with a slip stitch, fasten off and hide the yarn end.

20. Attach the Calyx and Assemble the Daisy Pot
- Position the green calyx behind the flower and attach both with the stem, using a small amount of glue.
- Attach the stem to the soil insert and add leaves.
- Fit and glue the soil insert inside the outer pot.
Both daisy styles use the shared pot, stem, and leaves.


Option D: Sunflower
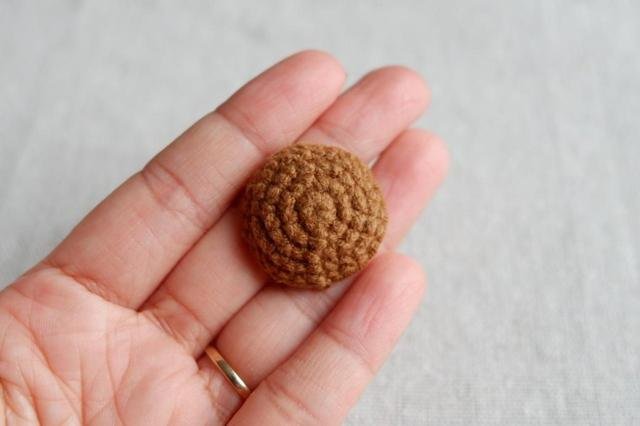
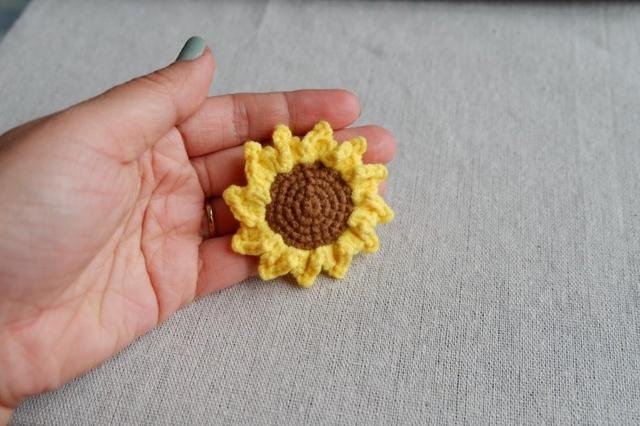
21. Crochet the Brown Sunflower Center
Use brown and join every round. After reaching 24 stitches, work one even round to give the center depth. Fasten off and weave in the end.
| Round / row | Instructions | Count |
|---|---|---|
| 1 | 6 sc in MR; sl st to join | 6 |
| 2 | Ch 1, 6 inc; sl st to join | 12 |
| 3 | Ch 1; (sc, inc) × 6; sl st to join | 18 |
| 4 | Ch 1; (2 sc, inc) × 6; sl st to join | 24 |
| 5 | Ch 1, 24 sc; sl st to join | 24 |
22. Begin One Yellow Sunflower Petal
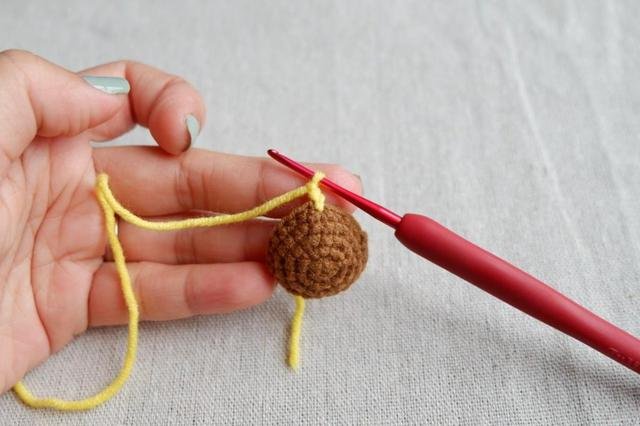
Join yellow at the center edge. In the same base stitch, work chain 2, hdc, and dc. Then chain 2 and work the joining slip stitch through the hdc/dc loops indicated in the source. Follow the original hand-position photos for that small pointed tip.

23. Complete the Petal Group and Repeat
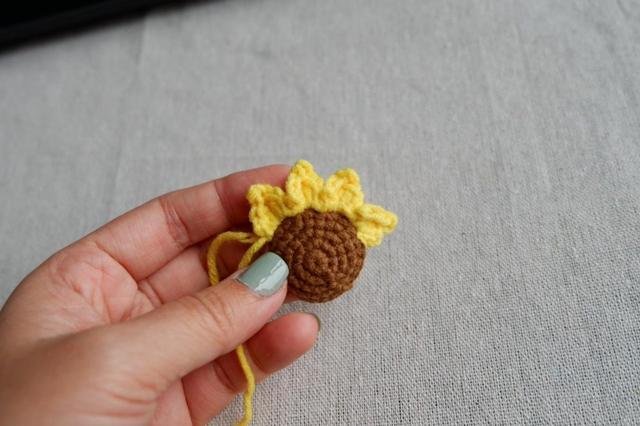
Continue with dc, hdc, chain 2, and a slip stitch into the same base stitch. Repeat the complete group to make 12 petals.
Placement: The supplied text gives a 24-stitch center and 12 petals but does not state exactly how to advance between base stitches. The photos help with positioning; that missing advance is not replaced here with an invented instruction.

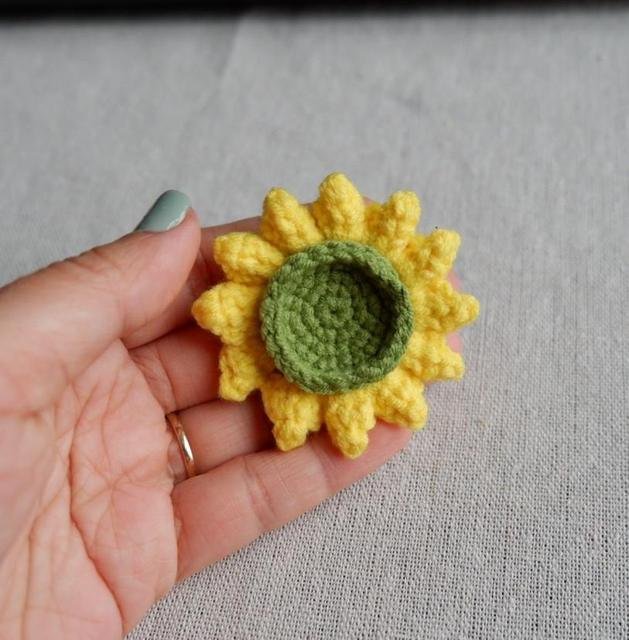
24. Crochet the Sunflower Calyx
Use green and work in a spiral. Make the backing to 24 sc, then fasten off and weave in the end.
| Round / row | Instructions | Count |
|---|---|---|
| 1 | 6 sc in MR | 6 |
| 2 | 6 inc | 12 |
| 3 | (sc, inc) × 6 | 18 |
| 4 | (2 sc, inc) × 6 | 24 |

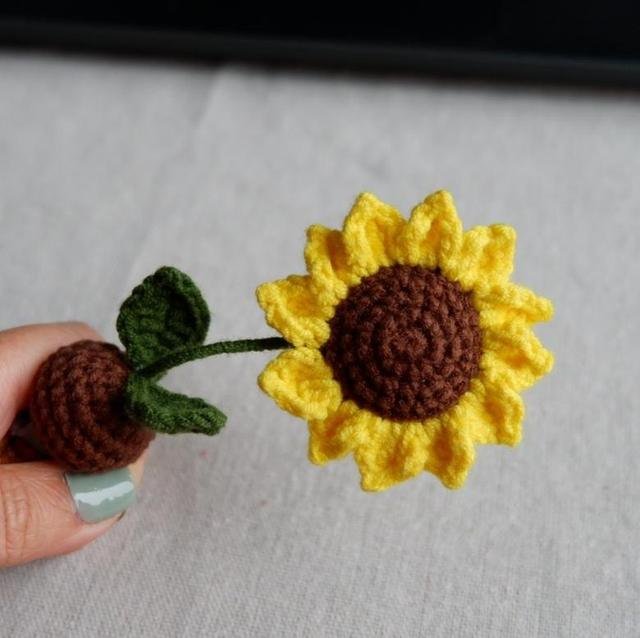
25. Assemble the Sunflower Pot
- Attach the flower and calyx together with the wrapped stem.
- Attach the stem to the soil insert and add the leaves.
- Glue the soil insert into the outer pot.

Bonus Option: Heart Topper
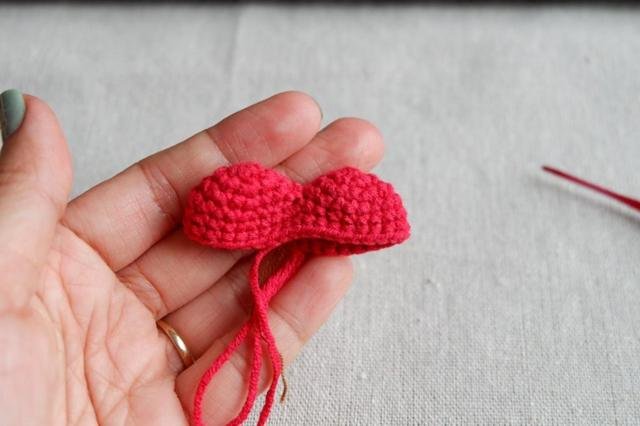
26. Make Two Heart Lobes
Use your chosen heart color. Make two identical pieces, each ending at 18 sc. Keep a working yarn connection on the piece used to join them.
| Round / row | Instructions | Count |
|---|---|---|
| 1 | 6 sc in MR | 6 |
| 2 | 6 inc | 12 |
| 3 | (sc, inc) × 6 | 18 |
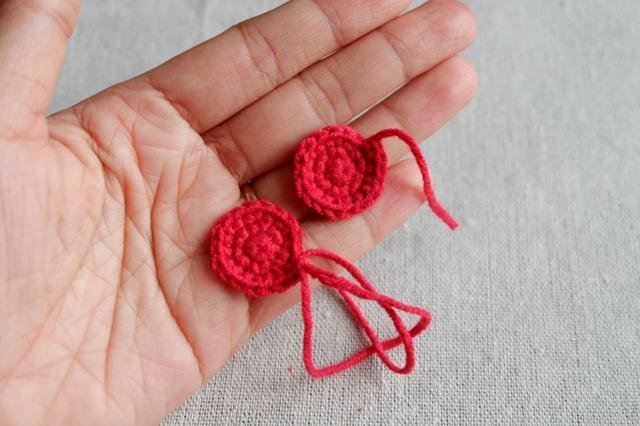
27. Join the Lobes and Begin the Heart Body
Work 18 sc around the first piece and 18 around the second to join the two lobes into one round. The resulting count is 36, not 18: 18 + 18 = 36. This corrects the count printed beside that round in the source. Continue with two even rounds.
| Round / row | Instructions | Count |
|---|---|---|
| 4 | 18 sc on first lobe, 18 sc on second | 36 |
| 5-6 | 36 sc in each round | 36 |
28. Shape the Heart with Decreases
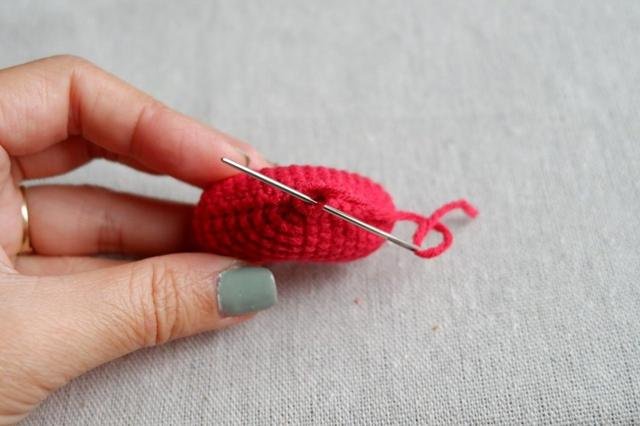
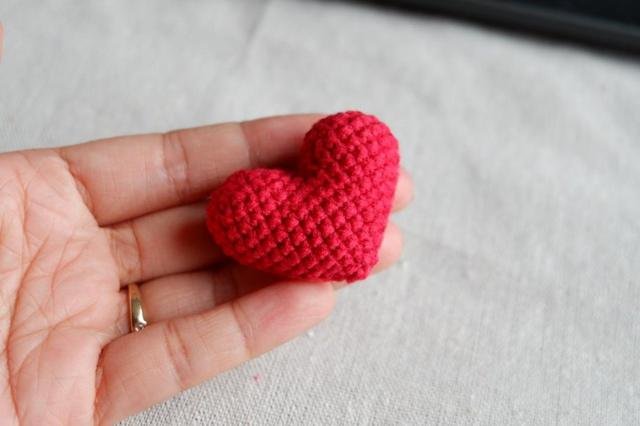
Keep the two sides balanced and move the marker every round. Each round has four decreases, reducing the total by four stitches. Add fiberfill before the opening becomes too small; the source photographs show a stuffed heart.
| Round / row | Instructions | Count |
|---|---|---|
| 7 | 7 sc, 2 dec, 14 sc, 2 dec, 7 sc | 32 |
| 8 | 6 sc, 2 dec, 12 sc, 2 dec, 6 sc | 28 |
| 9 | 5 sc, 2 dec, 10 sc, 2 dec, 5 sc | 24 |
| 10 | 4 sc, 2 dec, 8 sc, 2 dec, 4 sc | 20 |
| 11 | 3 sc, 2 dec, 6 sc, 2 dec, 3 sc | 16 |
| 12 | 2 sc, 2 dec, 4 sc, 2 dec, 2 sc | 12 |
| 13 | 6 dec | 6 |
29. Close the Heart and Prepare It for Display
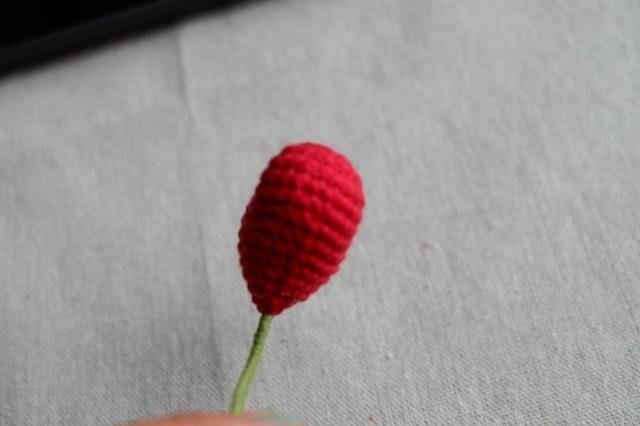
Finish stuffing as needed, thread the yarn tail through the remaining front loops, pull closed and secure it. The source shows the completed heart on a wrapped stem; use the shared pot construction if you want to display it as a mini-pot topper.

Beginner Checks Before Finishing
- Count stitches after each increase or decrease round.
- Follow the stated joins: do not add a slip stitch to a spiral round.
- Keep filling inside the piece rather than pushing it between stitches.
- Check the soil insert fits the pot before gluing.
- Use the original photos for the sunflower tip construction and flower assembly.
- Hide yarn tails and cover the ends of the stem wire.
Choose Your Next Mini Flower
Once the shared pot and soil insert are familiar, change only the flower head for the next variation. Use different petal colors to make a small coordinated collection.Crochet Flowers Tutorial
Based on the supplied Mini Flowers Pot pattern by Sunny Princess Crochet. Original reference photographs retained. This is a source-based companion guide; it has not been independently crochet-tested.