Crochet Rhododendron
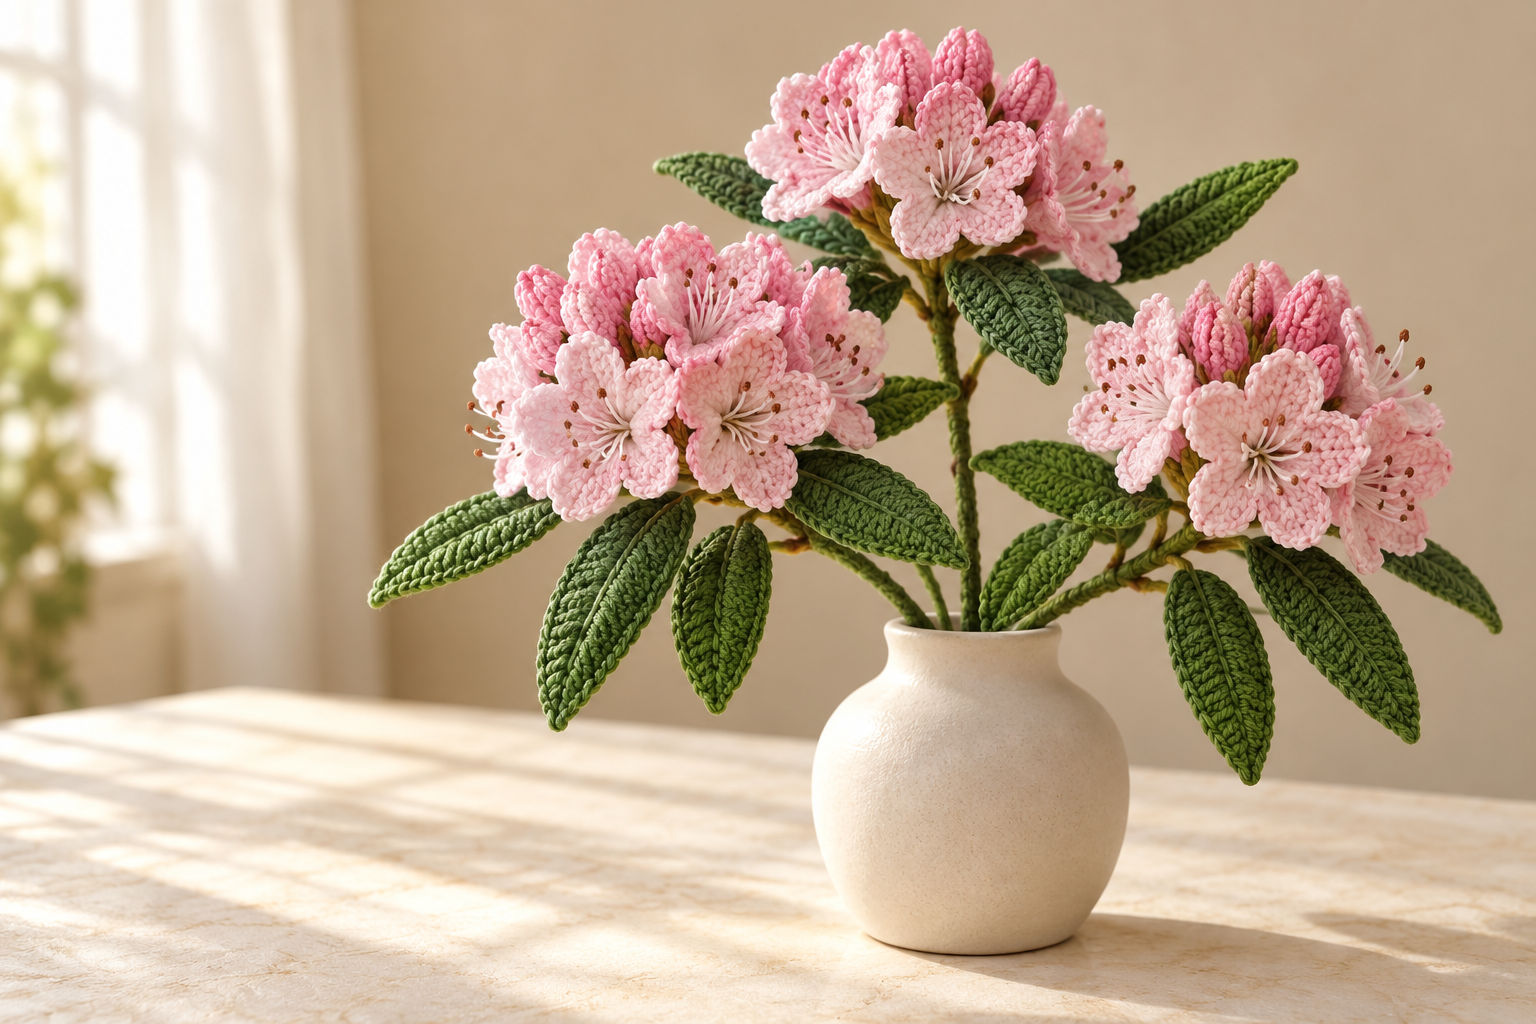
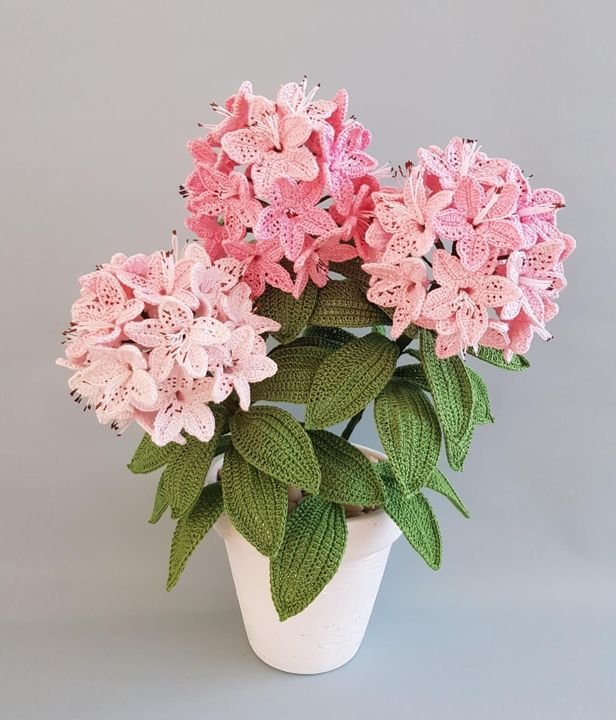
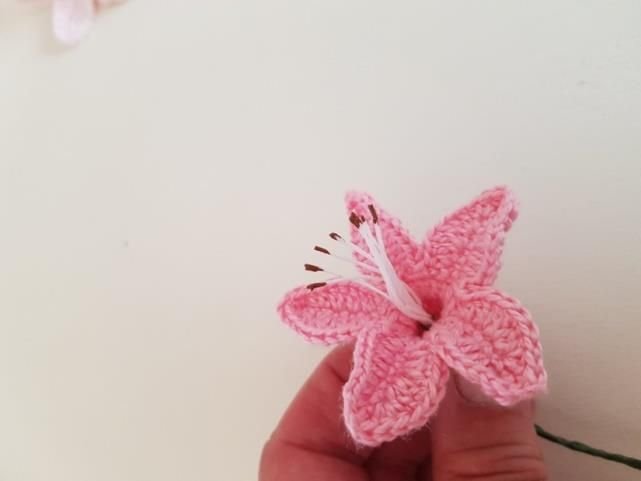
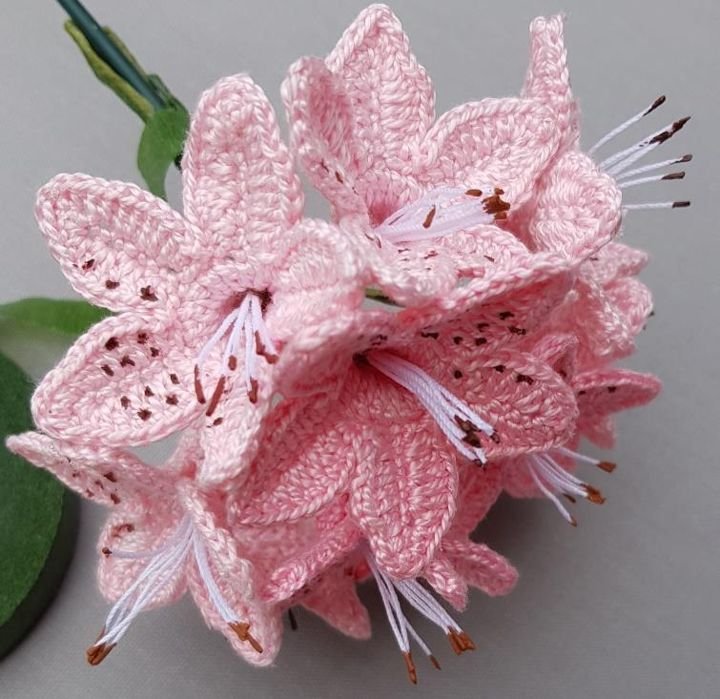
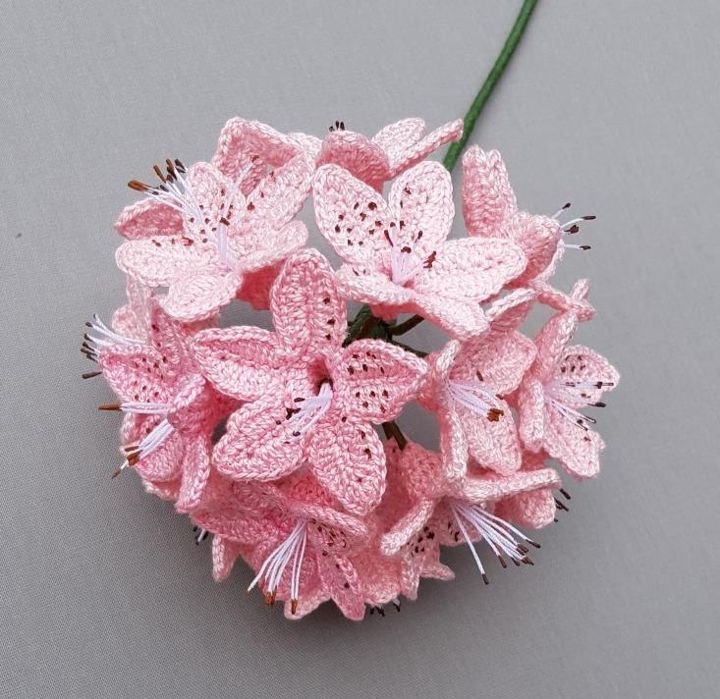
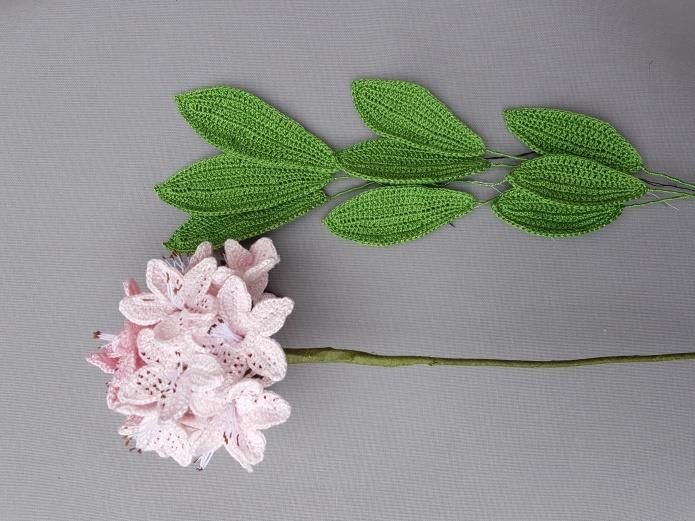
Create a rounded cluster of delicate five-petal flowers with fine stamens and leaves in three sizes. Follow the flower construction, finishing, and assembly in clearly separated stages.
Original design: Pippa Patterns, 2017. Plain-text instructions and reference photographs have been reorganized for this personal-use reading copy.
1.5 mm hook18 flowers per cluster9 leavesUS crochet terms
Materials and preparation
- 1.5 mm crochet hook and fine cotton crochet thread. The source uses Petra No. 5; changing thread thickness changes the finished size.
- Flower colors of your choice and green thread for leaves.
- Garden wire for the main stem: 2 mm, 3 mm, or 3.5 mm. The source model uses 3.5 mm; a wooden garden stake is an alternative.
- 0.46 mm / 28-gauge florist wire for the leaves and fine flower supports.
- Green floral tape, sewing pins, and hairspray for shaping.
- White yarn for the stamens; PVA craft glue, a paintbrush, and foil for stiffening.
- Optional medium-to-dark brown acrylic paint or oil pastel for details.
- A vase or pot. For a pot, use a fitted piece of dry floral foam or polystyrene and cover with pebbles or soil if desired.
Keep the tension consistent. Make one flower first, then repeat for the cluster. This copy follows the source construction, including its wire-supported assembly.
Stitch key
| Term | Meaning |
|---|---|
| ch | Chain |
| sc | Single crochet |
| hdc | Half double crochet |
| dc | Double crochet |
| tc | US treble crochet |
| inc | Work two stitches of the stated type in one stitch |
| dec | Decrease two stitches into one |
| tog | Together |
| sl st / slst | Slip stitch |
| st | Stitch |
| rnd | Round |
| F/O | Fasten off |
Brackets group stitches worked into the same stitch: (3 sc) means three single crochets in one stitch. (3 sc) × 2 means three single crochets in each of the next two stitches.
The following text retains the source’s stitch sequences. Reference photos illustrate the stages; their small photo numbers refer to the accompanying original sequence.
01 · Project overview
STAGE 01
Plan the flower cluster
Notes: When you see stitches in brackets, it means that all the ones in the bracket are worked in to one stitch. Example: (sc inc) means 2sc worked in to one stitch. (3sc) means 3sc in the same stitch. (3sc) x 2 means 3sc in each of the next 2 stitches.
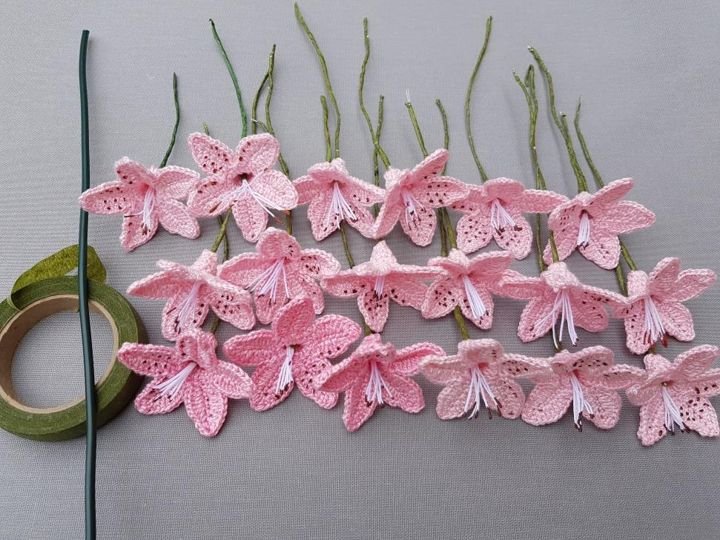
Each Rhododendron ball is made of 18 flowers. Following the tutorial and using the recommended yarn, your finished flower Ball will measure approximately 5”(13cm) circumference. Each single flower measures approx. 2”(5cm). The leaves are in 3 sizes : Large 4”(10cm), Medium 3.5”(9cm), Small 3”(7.5cm). I made 3 of each for this model.
Flower ball 1 is made of 15 flowers of color 54416 and 3 of 54458. Flower ball 2 is made of 15 flowers of color 54458 and 3 of 5151. Flower ball 3 is made of 15 flowers of color 5151 and 3 of 54458
02 · Crochet the flowers
STAGE 02
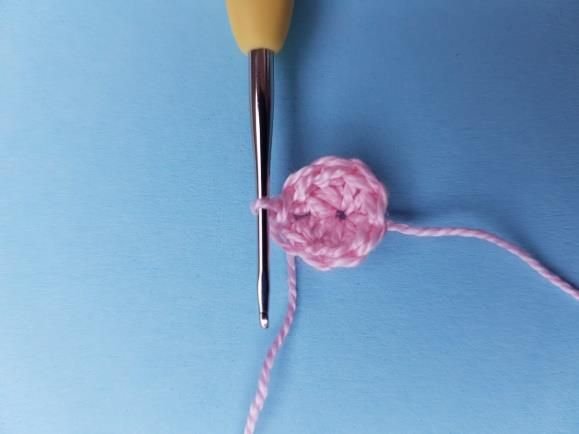
Crochet the flower base
Make18
Starting with the base of the flower,
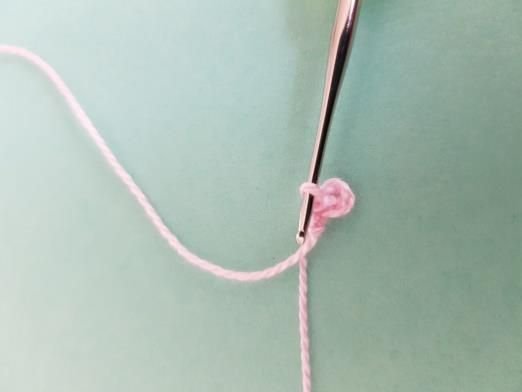
Ch3 and slst to join in to a ring,
the chain of 3 is not counted as stitch, only to join the rounds. This applies for all 3 of the rounds.
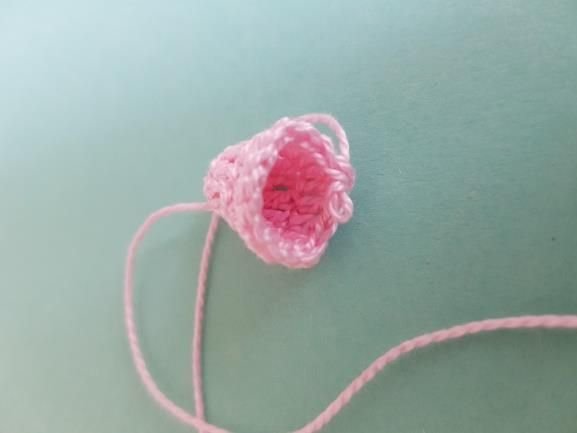
Rnd.1: ch3, work 9dc in to the ring = 9dc – slst to join
Rnd.2: ch3, (dc inc), 2dc around = 12dc – slst to join
Rnd.3: ch3, (dc inc), 3dc around = 15dc – slst to join


STAGE 03
Make the five petal foundations
Flower continued
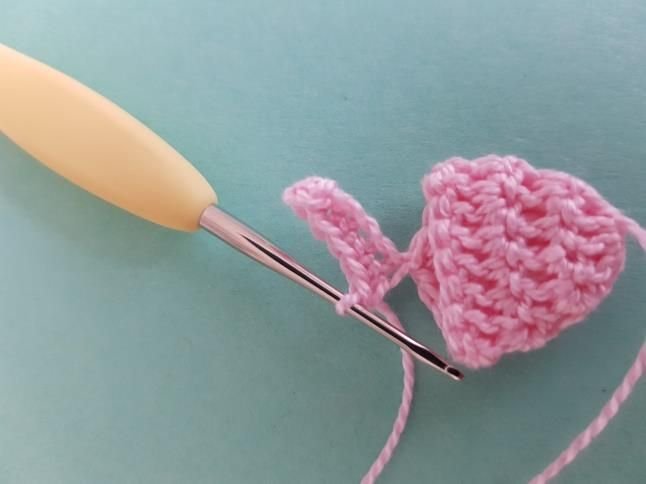
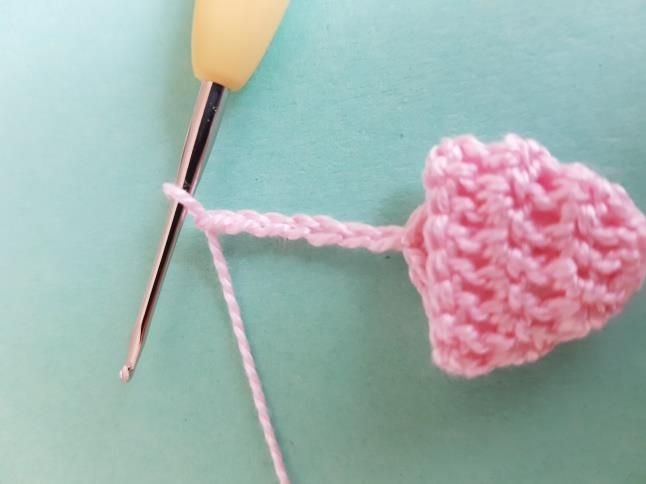
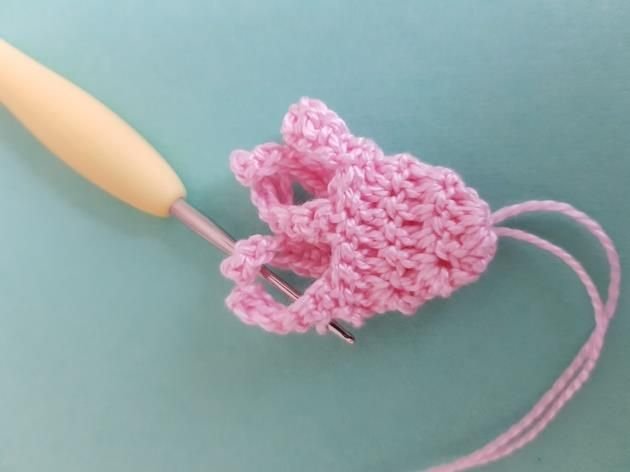
Petals:
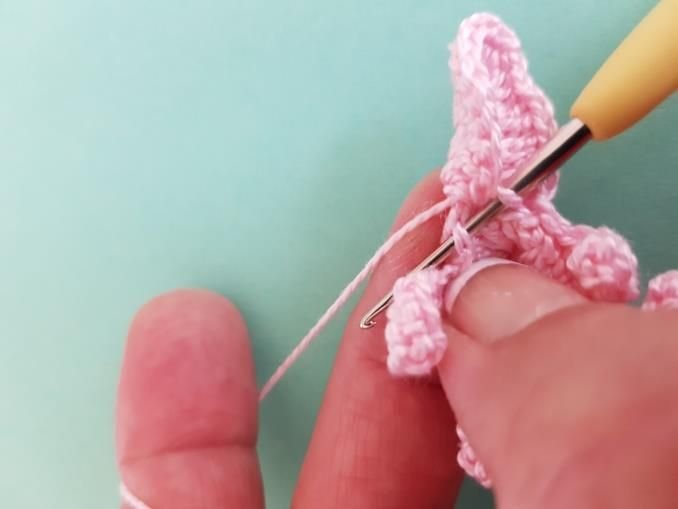
Work 1slst in each of the next 3 stitches at skip the first chain and work 5sc down ch7 the base, the chain
Ch7 again and repeat for 5 petals. After the 5th petal, work only 2 slip stitches instead of 3.



STAGE 04
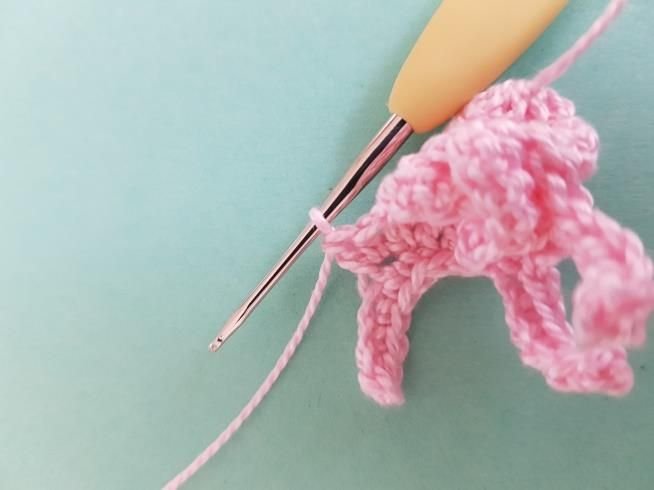
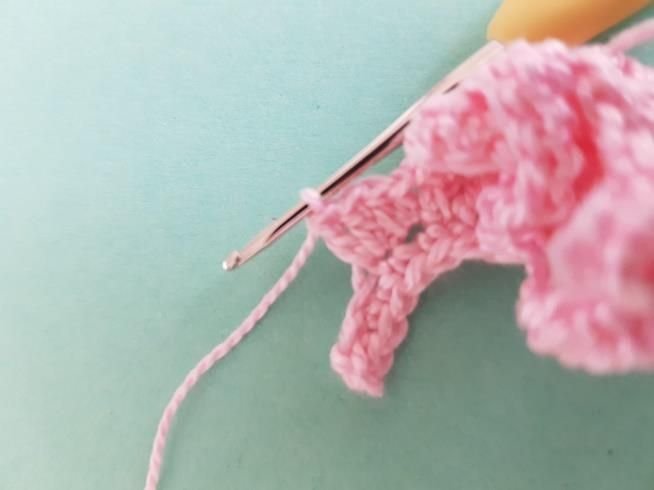
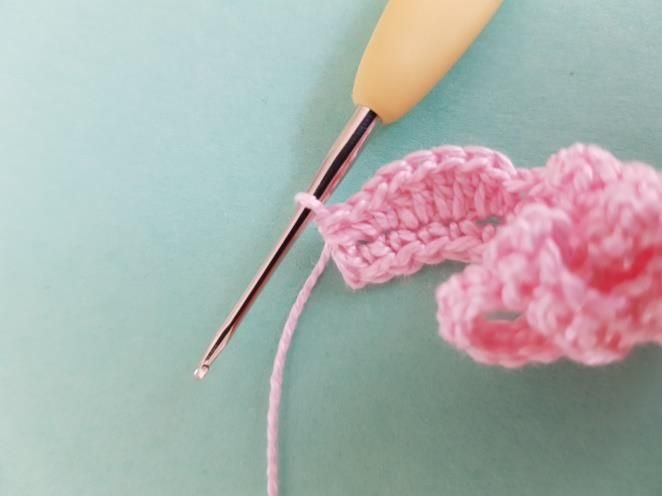
Shape the first side of a petal
Flower cont …
In the second, work (2dc), **** work (1hdc, 1dc) In to the 1st stitch of the next petal,
In the third, work also in the fourth, work and in the fifth, work (2dc), (2hdc) 1hdc,



STAGE 05
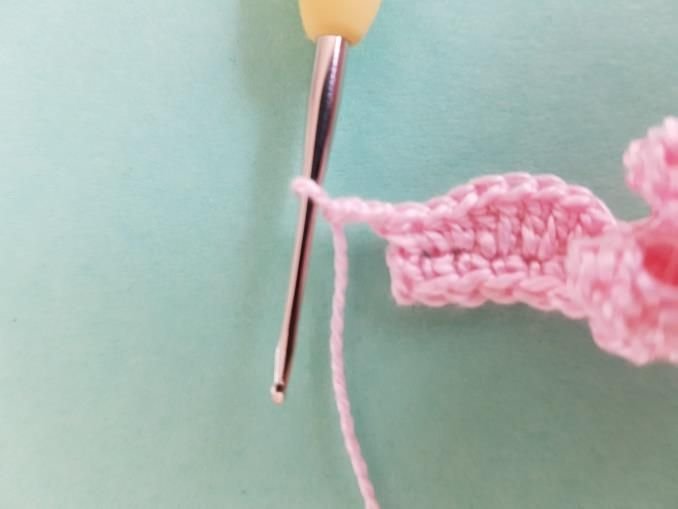
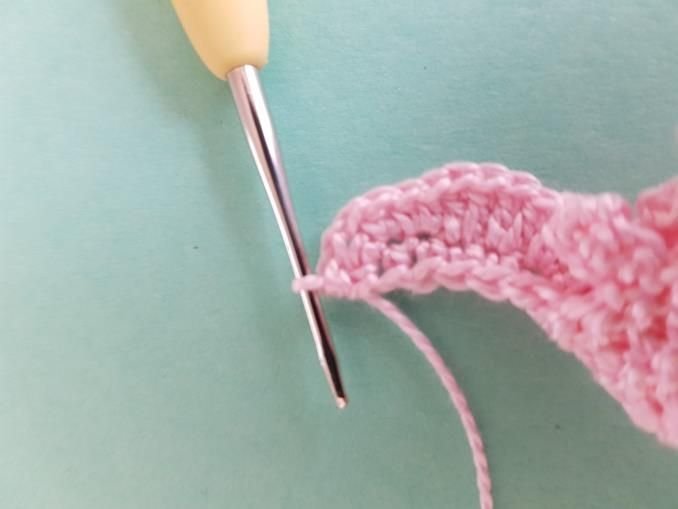
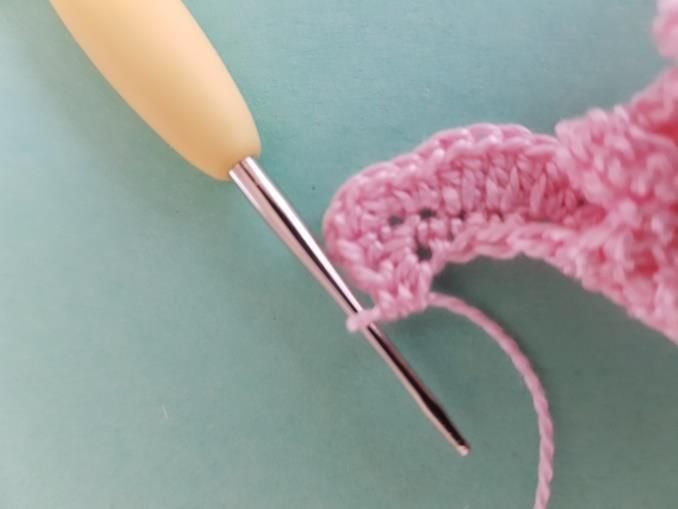
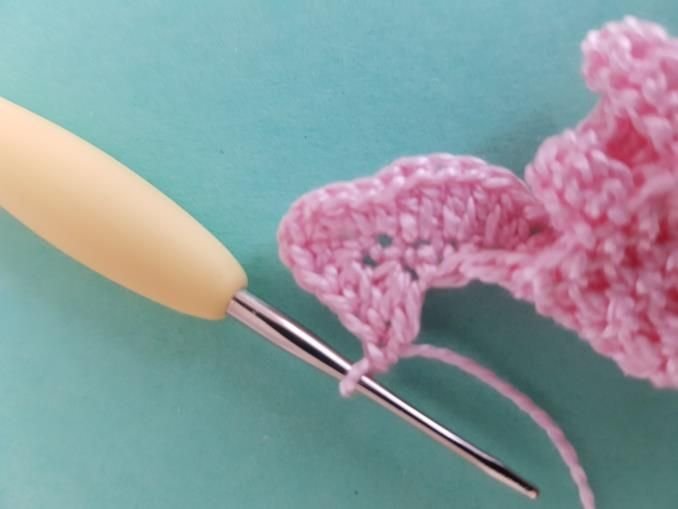
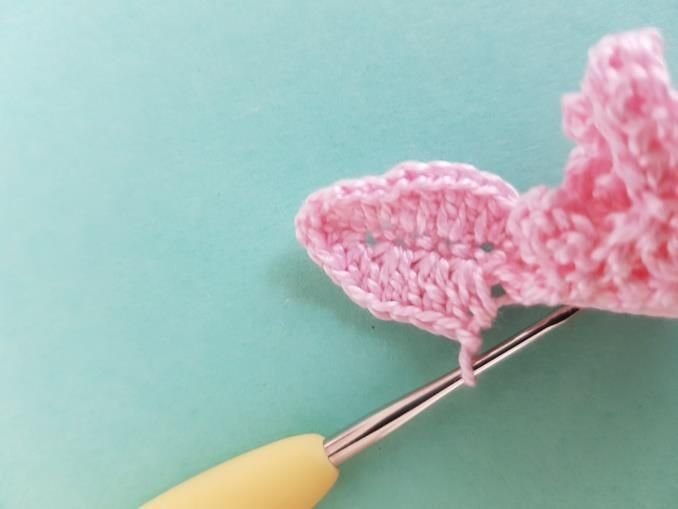
Work around the petal tip
Flower cont …
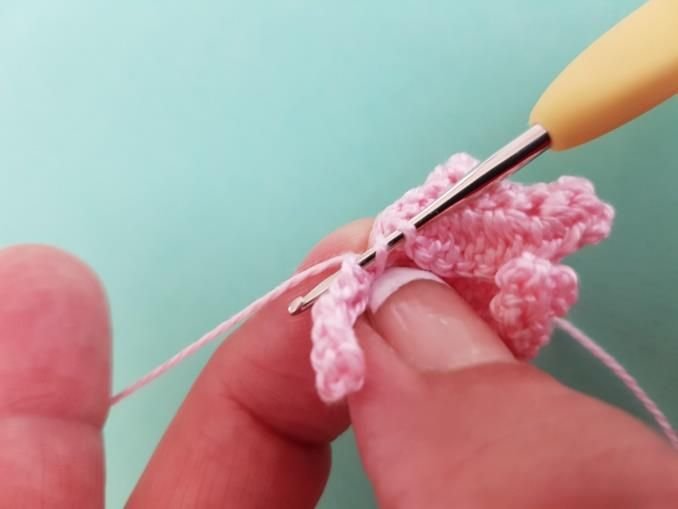
Going down the other side, work 1hdc in the Chain2, 1st, (2hdc), in the 2nd,
(2dc) in the 3rd (2dc) in the 4th, (1dc, 1hdc) in the last,

STAGE 06
Finish all five petals
Flower cont …
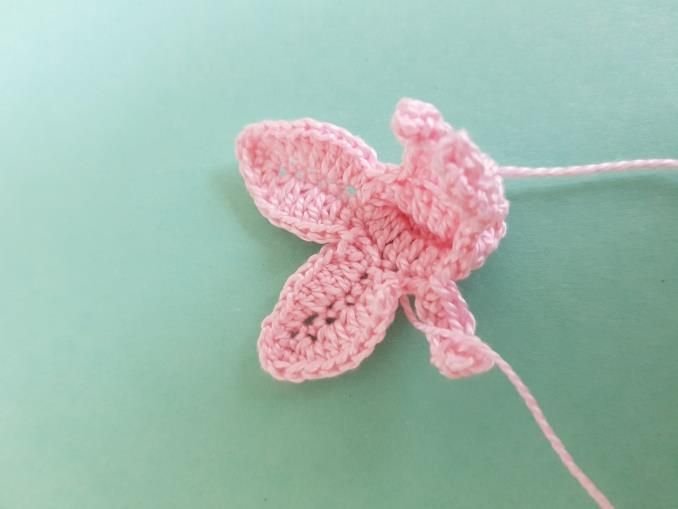
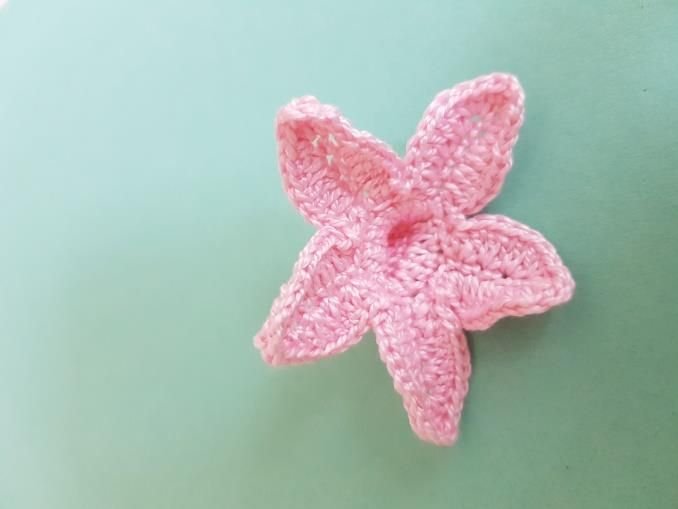
Back at the base, skip1, (1hdc,1dc) in the 1st stitch of the next petal, slst1, skip1,**** Repeat for 5 petals.
After the last petal, slst in to the base of the next petal, F/O


03 · Shape and decorate
STAGE 07
Shape and dry the flowers
the Flower
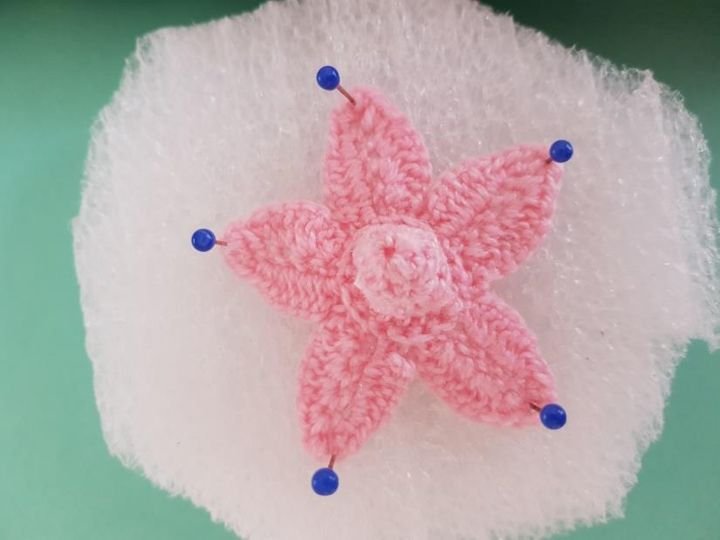
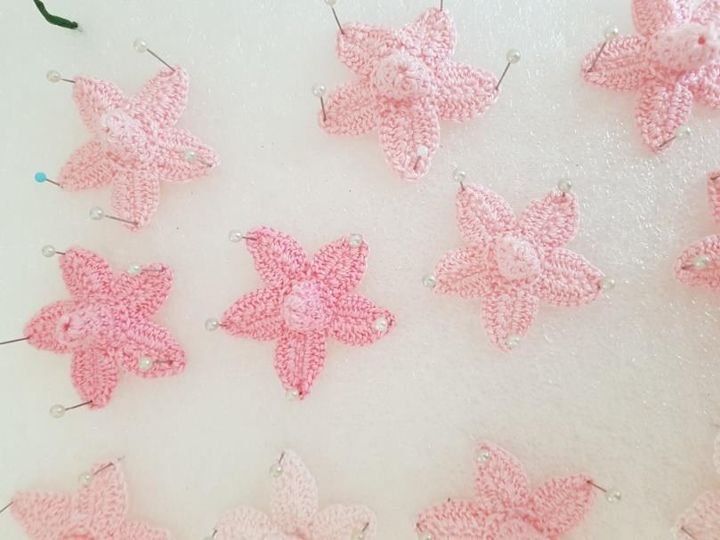
Pin the 5 petals with sewing needles and spray with Hairspray. Leave to dry.
STAGE 08
Add the first petal markings
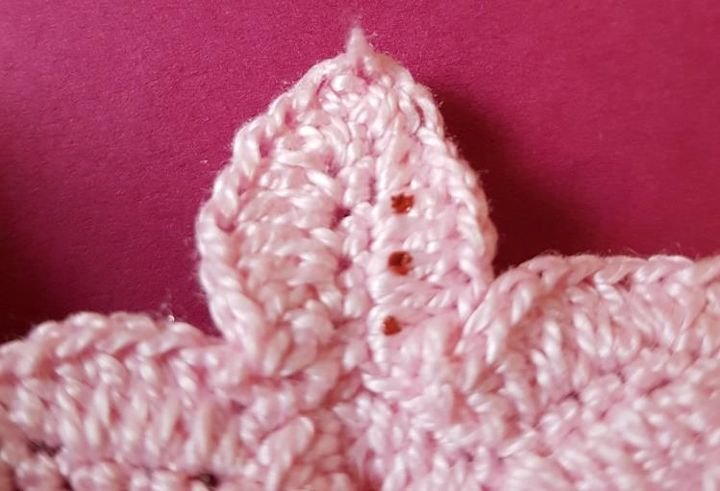
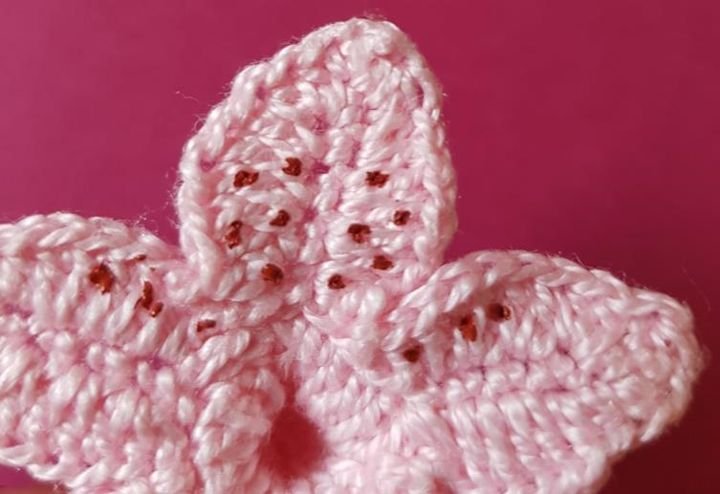
Use a medium to dark brown shade of acrylic paint. Only 3 of the petals will be painted. It doesn’t matter which 3 petals you paint as long as they are next to each other. I find this works best using a sewing pin as we want the dots to be only very tiny. Just dip the sewing pin in to the paint and push it through the yarn.
Start by painting 3 tiny dots on the side of the center row as shown in (picture 1).
Now put 2 dots to the right and in between the first 3 as shown in (picture 2).

STAGE 09
Complete the optional petal markings
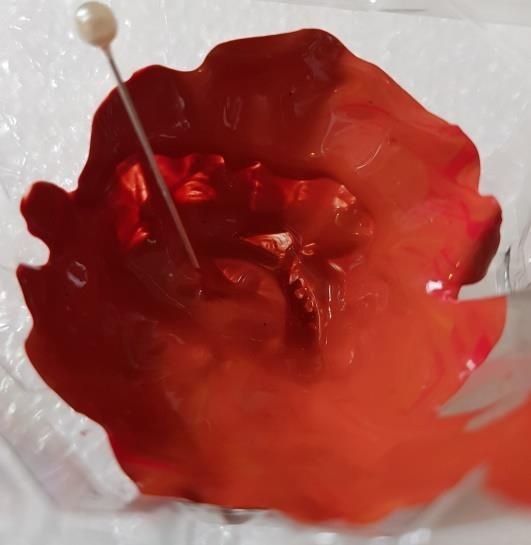
Paint the left side of the petal in the same way but mirror image (picture 1).
Finally paint 3 dots on the inside edge of both the petals to the left and right (picture 2). Leave to dry.

04 · Create and attach the stamens
STAGE 10
Prepare the stamen strands
Stamen
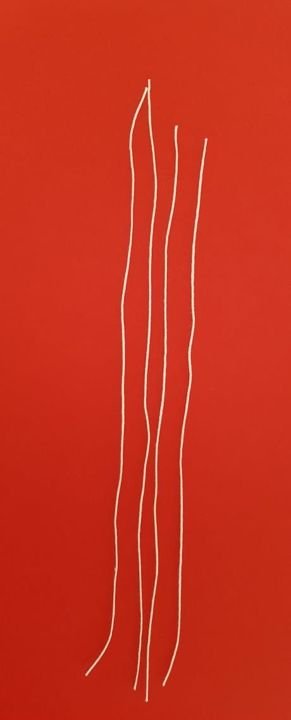
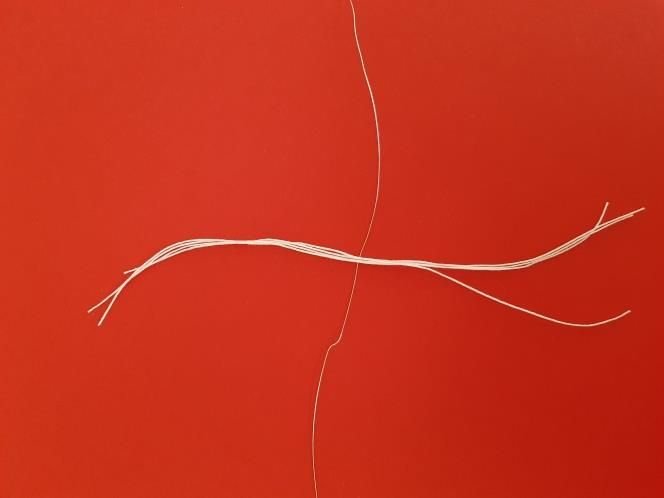
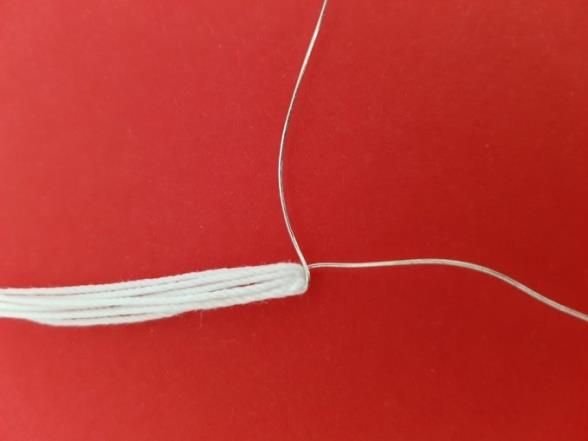
Cut 4 strands of white yarn or in the colour of your choice (p1). Also cut 1 piece of florist wire approx. 4”(10cm). Place the 4 strands over the wire (p2). Fold the yarn over the wire and bend the wire down equally while pulling the yarn in the opposite direction. (p3). You will now have 8 strands.
STAGE 11
Secure and trim the stamens
Stamen cont…
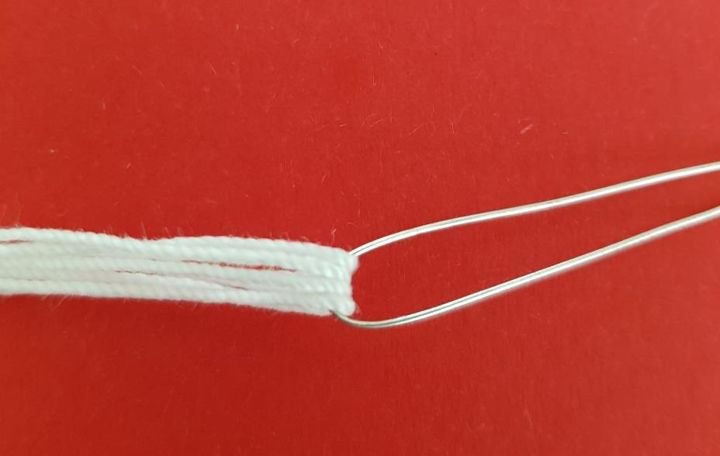
Bend one of the wires to the side as close to the yarn as possible (p1). Now twist the wire so that the yarn is held in place and does not slip out (p2). If your wire is too thick you can use small pliers to pinch the wire tight. Cut the yarn down to approx. 1”(2.5cm) (p3 & 4).
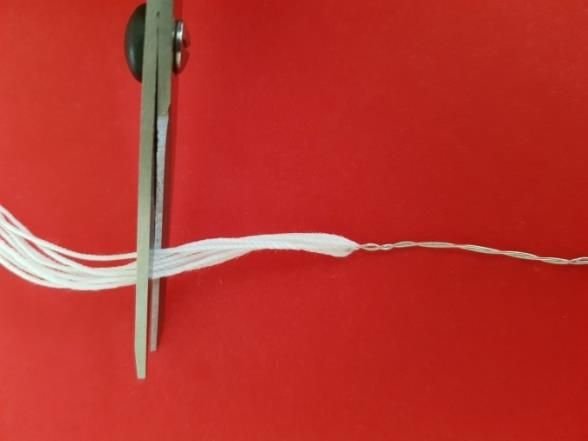
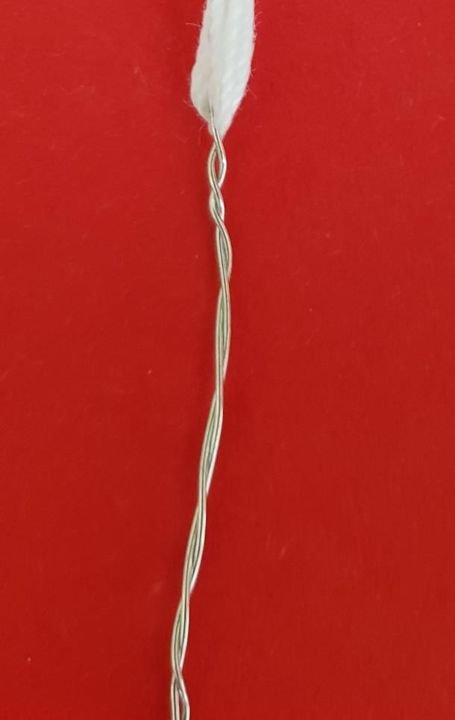
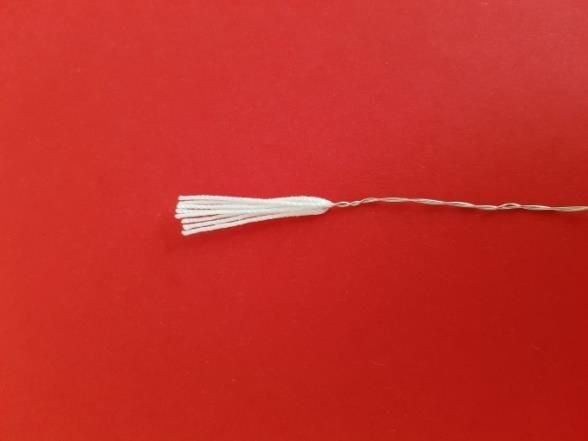
STAGE 12
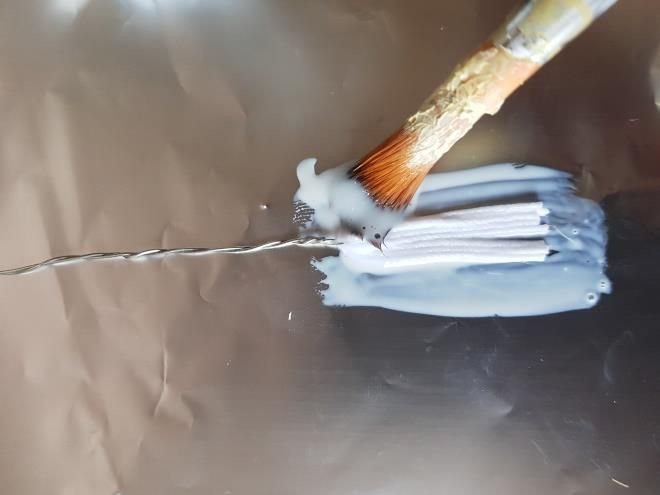
Stiffen the stamen strands
This part is to make the stamen firm so it will not hang once inserted in to the flower.
Oven foil is a great choice for this next step to work on the stamen as it will not leave residue on the yarn.
Apply a generous amount of PVA (craft glue) with a paintbrush so the strands are thoroughly soaked (p2).
Separate the strands while still wet (p3). I used a plastic darning needle but a sewing pin or cocktail skewer will work just as well. Leave to dry.
STAGE 13
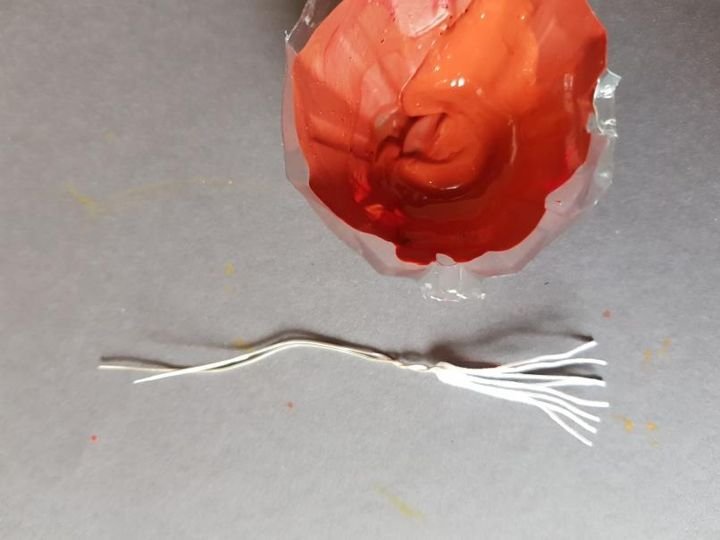
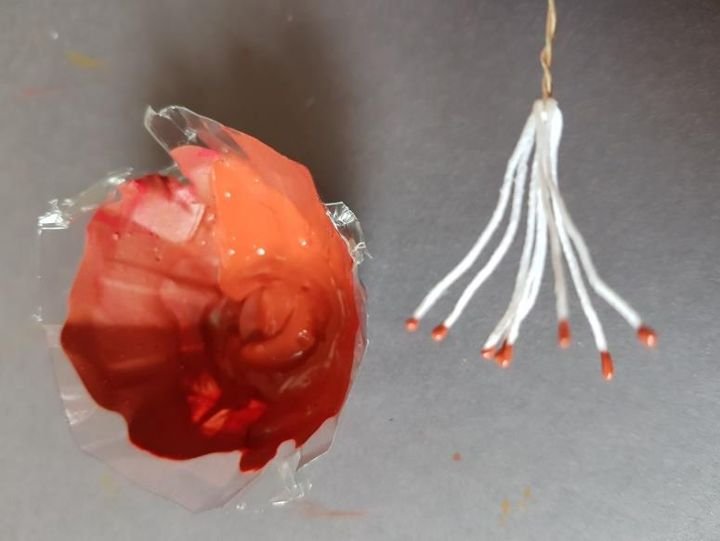
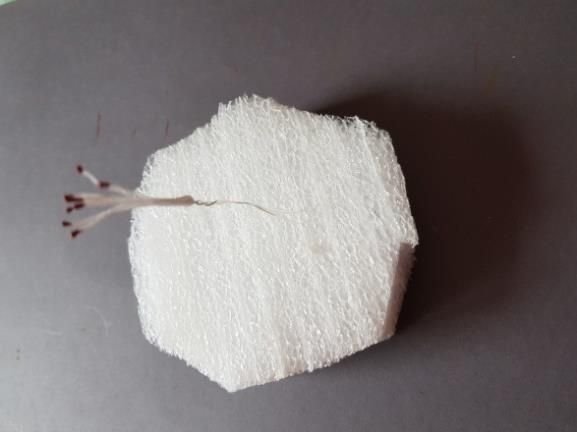
Paint the stamen tips
Once dried we can move on to painting the stamen. Use a medium to dark brown shade (same as for the petal) (p1) and just dip the ends of the stamen in to the paint (p2). It should now look like in (p3). Leave to dry. I used a piece of Polystyrene to push the stems in to avoid laying them down and clogging the paint (p4).

STAGE 14
Join the stamen and flower
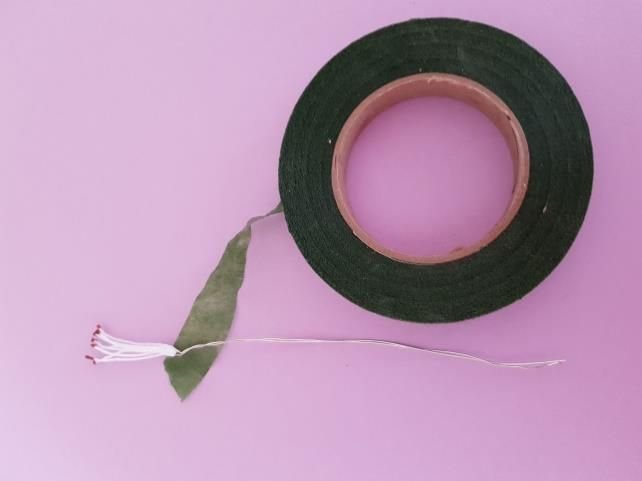
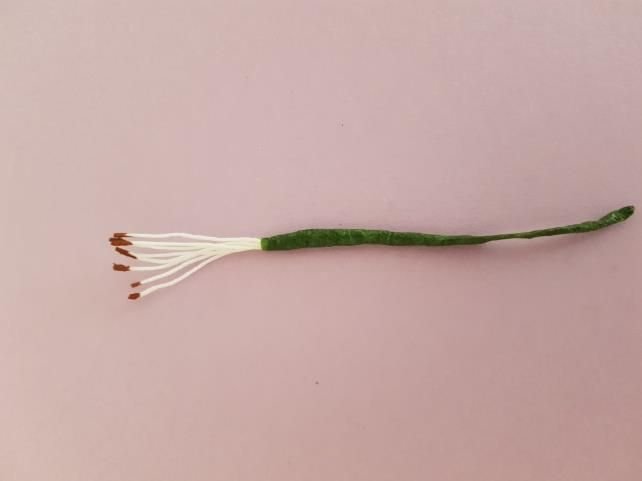
Wrap the wires of the stamen in floral tape (p1). Cover the part where the wire is holding the yarn in and wrap the tape around several times. This will make that area thicker so the flower won’t slip off (p2). Push the finished stamen wire through the flower (p3) and pull the flower all the way to the end of the tape (p4).

05 · Small leaves
STAGE 15
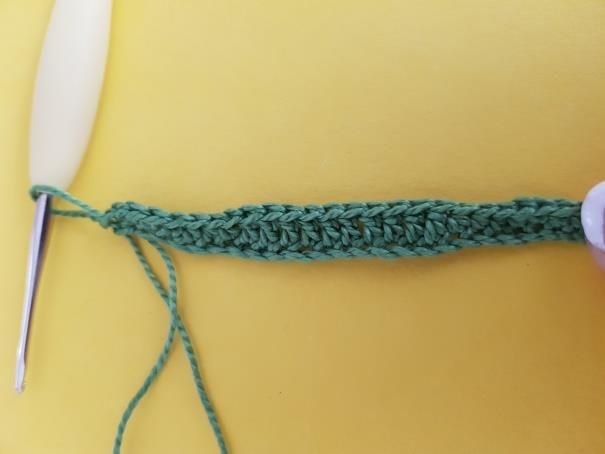
Small leaf: foundation and Round 1
Make 3
Chain 25,
Rnd.1: skip the first chain, 3sc, 4hdc, 10dc, 3hdc, 2sc,
(3sc) in the last chain,
Going down the other side,
2sc, 3hdc, 10dc, 4hdc, 3sc, 1slst, in to that skipped chain we made at the beginning, ch1

STAGE 16
Small leaf: Round 2
L eaf cont …
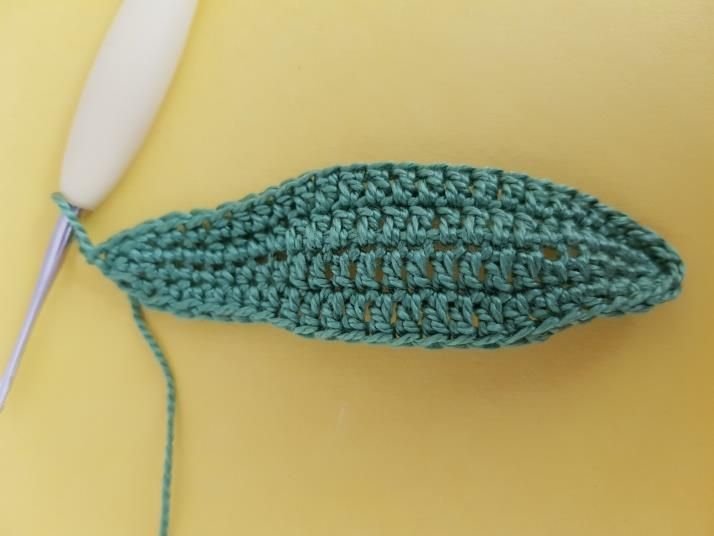
Rnd.2: 3sc, 4hdc, 10dc, 3hdc, 3sc,
1sc in the center stitch,
Going down the other side,
3sc, 3hdc, 10dc, 4hdc, 3sc, 1slst in the chain we made earlier,

STAGE 17
Small leaf: start the wired edge
We will now crochet over the florist wire, Cut a piece of approximately 12”(30cm) and thread it through the stitch on your hook (p1).
Crochet this whole round over the wire.
Rnd.3: ch1, 3sc, 4hdc, 10dc, 3hdc, 3sc,

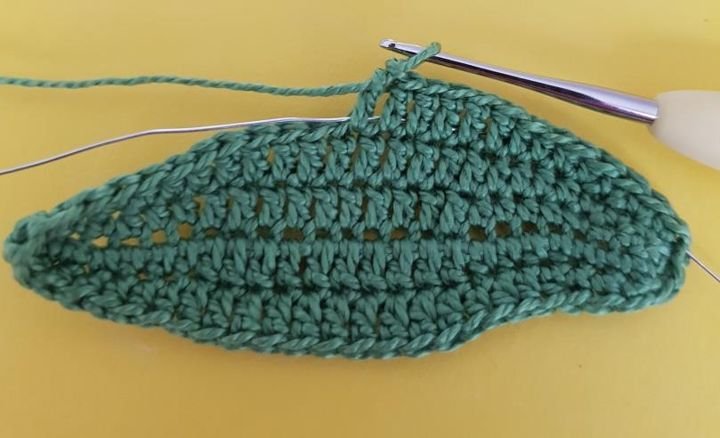
STAGE 18
Small leaf: shape the tip
In the center stitch work the following,
(1hdc, 1dc, ch1, slst in to the top of the hdc and the dc (p1), and then work 1hdc), Pull the wire around and bend down equally.

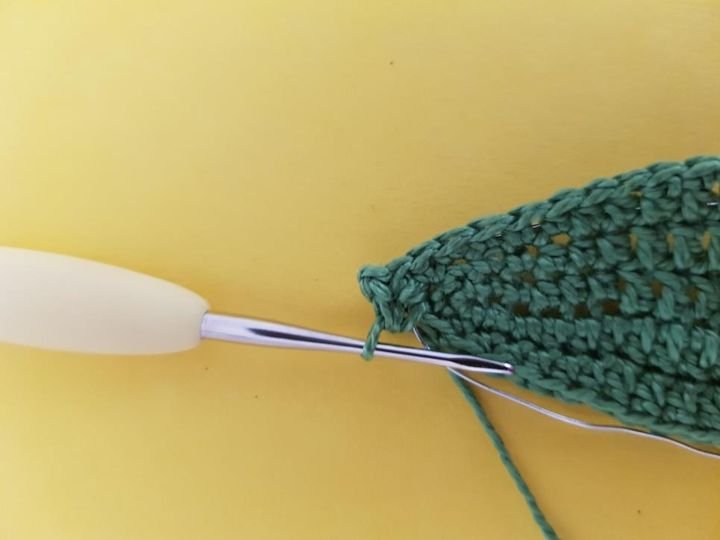
STAGE 19
Small leaf: finish and wrap the stem
Rnd.3: continued,
Going down the other side,
3sc, 3hdc, 10dc, 4hdc, 4sc, slst in the first chain on the opposite side,
Leave a long tail (p1) and do NOT cut the wires, they are needed for assembly.
Stretch the leaf in to shape. Wrap the tail around the wire to create the leaf stem (p2) and trap in between to secure it.


06 · Medium leaves
STAGE 20
Medium leaf: foundation and Round 1
Make 3 Chain 30,
Rnd.1: skip the first chain, 4sc, 5hdc, 6dc, 4tc, 3dc, 3hdc, 2sc,
(3sc) in the last chain,
Going down the other side,
2sc, 3hdc, 3dc, 4tc, 6dc, 5hdc 4sc, 1slst in to that skipped chain we made at the beginning and ch1,

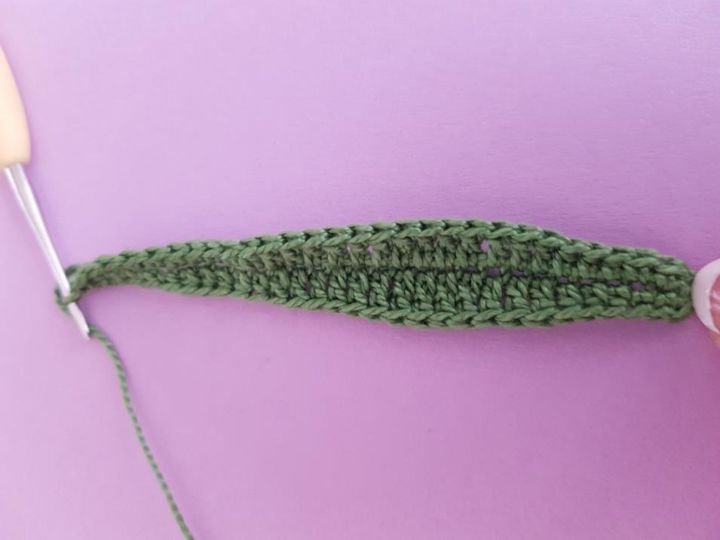
STAGE 21
Medium leaf: Round 2
Rnd.2: 4sc, 5hdc, 6dc, 4tc, 3dc, 3hdc, 3sc,
in the center stitch work 1sc,
Going down the other side,
3sc, 3hdc, 3dc, 4tc, 6dc, 5hdc 4sc, 1slst in the chain we made earlier,
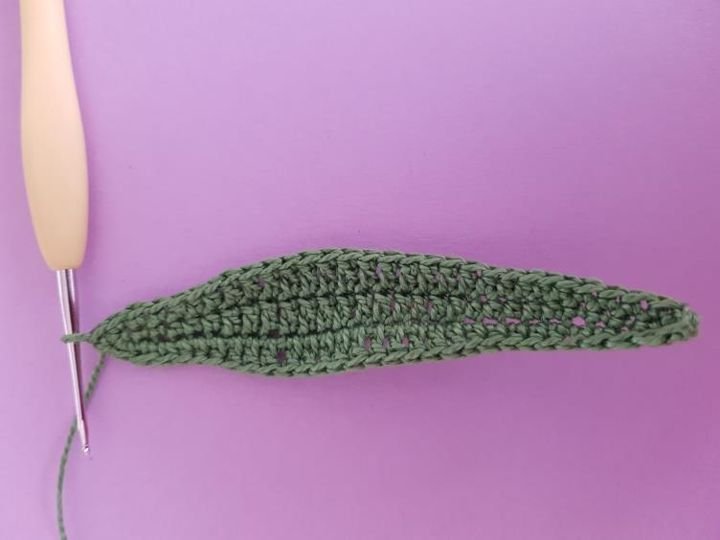
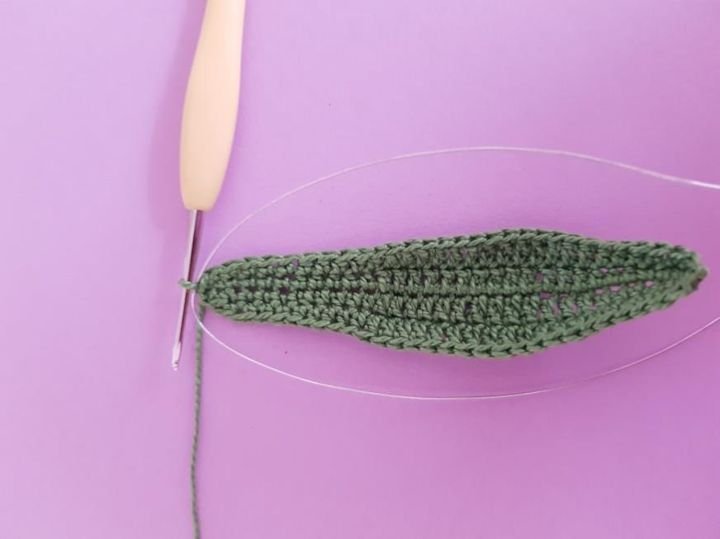
As with the smaller leaf ,we need to crochet over the wire again. Cut approx. 14” (35cm) and thread it through the stitch on your hook.
STAGE 22
Medium leaf: wired edge and finishing
Rnd.3: Ch1, 4sc, 5hdc, 6dc, 4tc, 3dc, 3hdc, 3sc,
Center stitch (1hdc, 1dc, ch1, slst, 1hdc),
Pull the wire around and bend down equally.
Going down the other side,
3sc, 3hdc, 3dc, 4tc, 6dc, 5hdc 5sc,
slst in the first chain on the opposite side, as before, leave a long tail and wrap it around the wires.


07 · Large leaves
STAGE 23
Large leaf: foundation and Round 1
Make 3
Chain 35,
Rnd.1: skip the first chain, 5sc, 5hdc, 8dc, 6tc, 3dc, 3hdc, 2sc,
(3sc) in the last chain,
Going down the other side,
2sc, 3hdc, 3dc, 6tc, 8dc, 5hdc 5sc, 1slst in to the skipped chain we made at the beginning and ch1,


STAGE 24
Large leaf: Round 2
Rnd.2: 5sc, 5hdc, 8dc, 6tc, 3dc, 3hdc, 3sc,
1sc in the center stitch,
Going down the other side,
3sc, 3hdc, 3dc, 6tc, 8dc, 5hdc, 5sc, 1slst in the chain we made earlier,
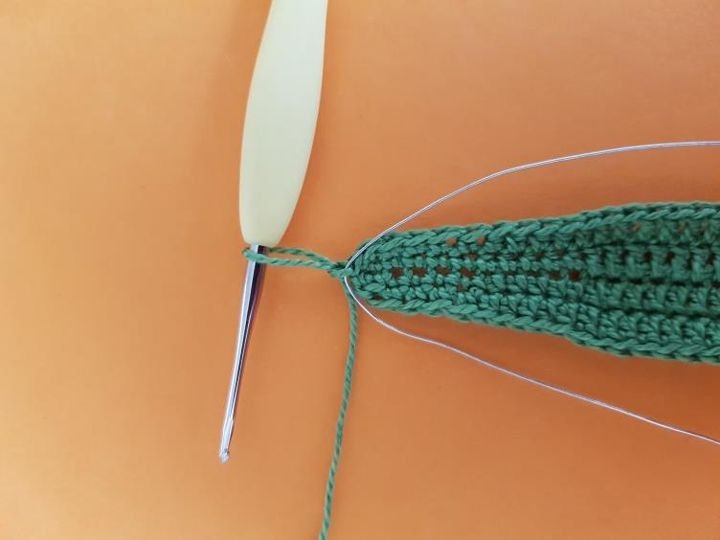
As with the other leaves ,we need to crochet over the wire again. Cut approx. 16” (40cm) and thread it through the stitch on your hook.

STAGE 25
Large leaf: wired edge and finishing
Rnd.3: Ch1, 5sc, 5hdc, 8dc, 6tc, 3dc, 3hdc, 3sc,
Center stitch (1hdc, 1dc, ch1, slst, 1hdc),
Pull the wire around and bend down equally.
Going down the other side,
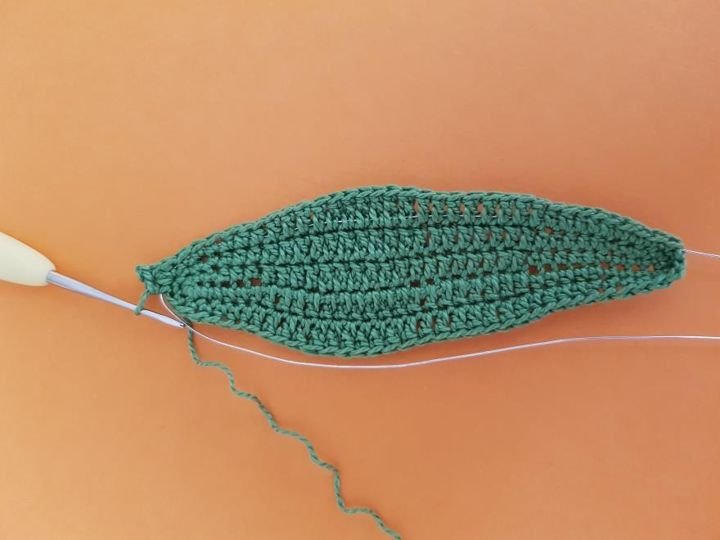
3sc, 3hdc, 3dc, 6tc, 8dc, 5hdc, 6sc,
slst in the first chain on the opposite side, as before, leave a long tail and wrap it around the wires.

08 · Assemble the branch
STAGE 26
Prepare all parts for assembly
Cut a piece of the garden wire (stem) approx. 12 -14”(30-35cm) or to the size that will fit your vase or plant pot. This will be the stem. You should now have all the parts shown in picture 1 ready to be assembled. 18 flowers, 1stem and 9 leaves. Start each ball with the 3 flowers of a different shade unless you made them all in the same colour. Those 3 will be at the top of the Rhododendron ball.


STAGE 27
Position the first top flower
continued
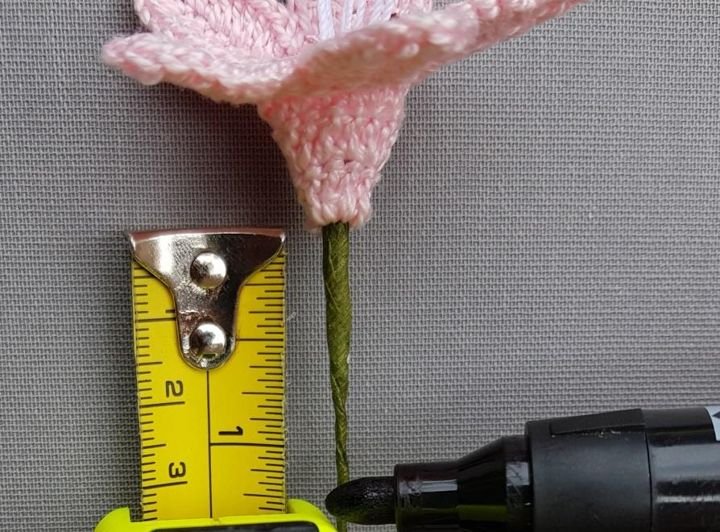
Measure approx. 1.2”(3cm) from the base of the flower head and mark it. Do this for all of the flowers (p1). For this top round, we need 3 flowers in total (different shade). Place the first flower next to the stem so that the mark is lining up with the top of the stem (p2). Attach it by wrapping it to the stem with floral tape (p3).


STAGE 28
Complete the three-flower top layer
continued
Round 1
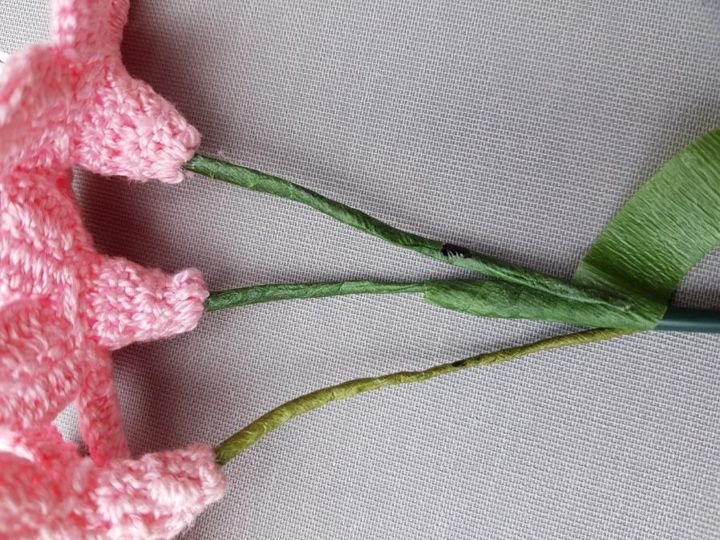
Add the second flower just a fraction lower than the first (p1). Then add the third flower at the same level as the second (p2). It should now look as in (p3).


STAGE 29
Add the seven-flower middle layer
continued
Round 2
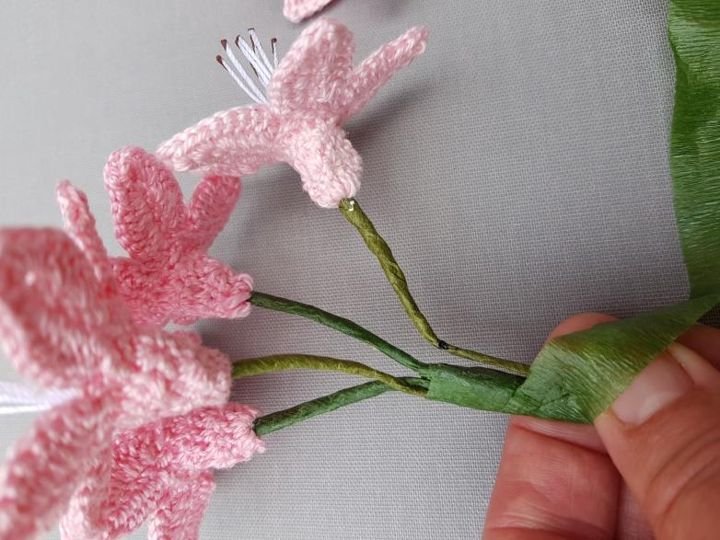
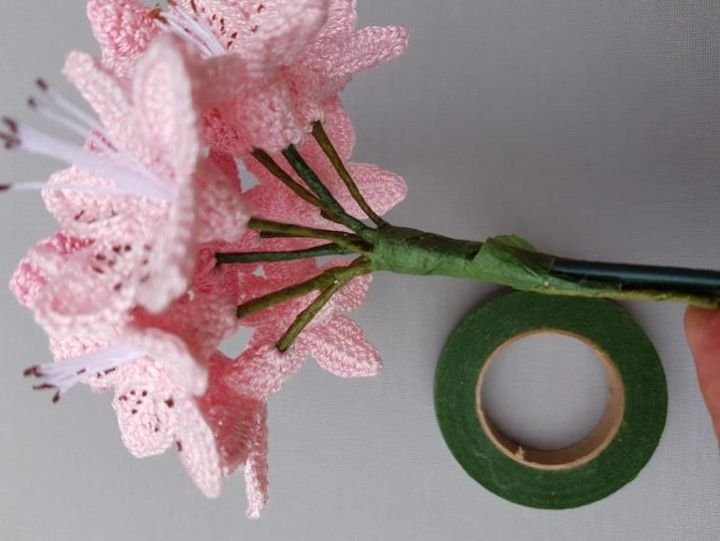
The second round has 7 flowers. Attach them approx. ½(1.2cm) below the round above (p1). Attach all 7 flowers one by one, next to each other at pretty much the same level. It doesn’t have to be exact. If some are a bit lower than others is perfectly ok and makes it look more natural. In (p2 and p3)you can see all 7 flowers attached.
STAGE 30
Add the eight-flower lower layer
continued
Round 3
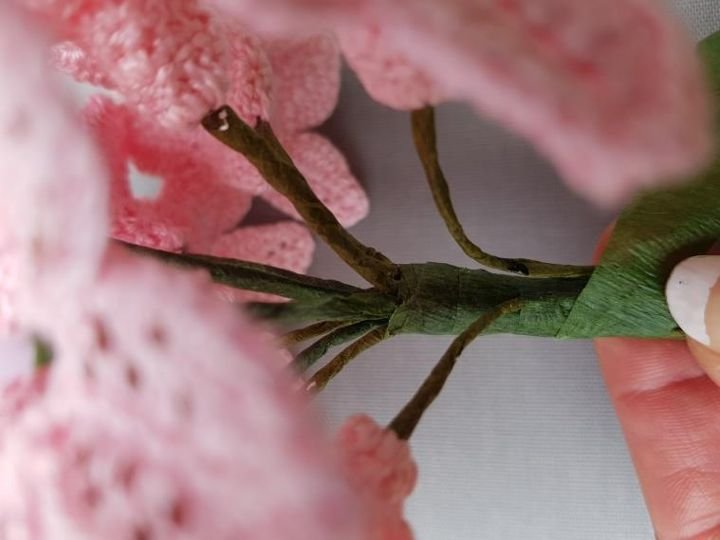
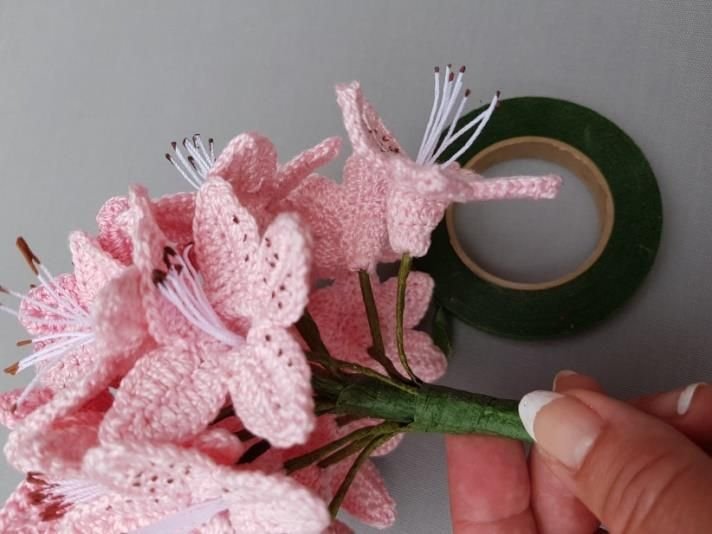
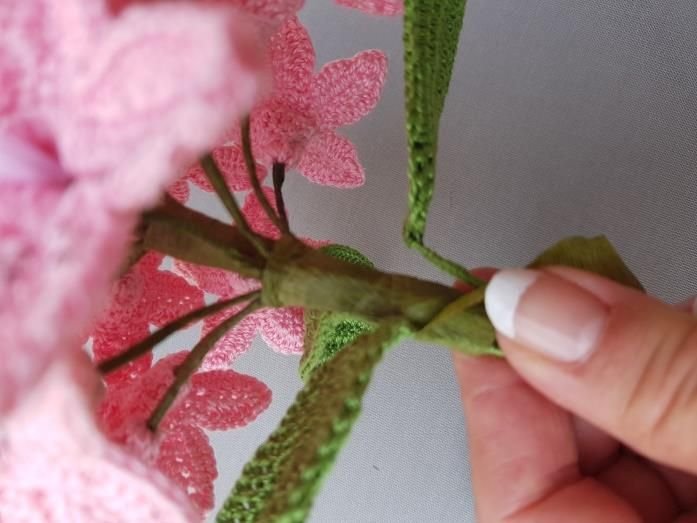
Add the remaining 8 flowers approx. 1”(2.5cm) below the second round (p1) attaching them one by one at the same level again (p2 and p3). Finally bend each little stem out at a slight angle (p4) and move the flowers around a bit to shape the flower ball (p5).


STAGE 31
Attach the three small leaves
Add the first small leaf approx. 1”(2.5cm) below the flowers (p2). Add the other 2 small leaves a fraction lower down (p3) and in a triangular form (p4).


STAGE 32
Attach medium and large leaves
Add the first of the medium leaves approx. ½” further down and add the other 2 medium leaves also in a triangular form each a fraction further down from the last and in between the small ones above. Finally add the 3 large leaves in the same way .


Final arrangement
Check the cluster shape and adjust the little flower stems gently. Arrange the small leaves first, then the medium and large leaves below them. Secure the wrapping and place the completed branch in your chosen pot or vase.Personal-use reading copy · Original design credit retained as text. Decorative logos, social promotions, and website/contact addresses are omitted.