How to Crochet a Multi Head Small Rose: Step by Step Tutorial
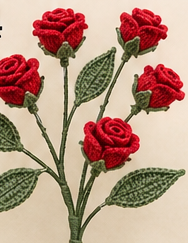
Create a delicate rose branch with cotton yarn, rolled petals, and leaves you can shape. This handmade project makes a lovely addition to a small vase, a crochet bouquet, or a thoughtful gift made by you.
This guide takes you from crocheting the petal strips, sepals, and leaves to rolling the roses and attaching them to the main stem. Choose red for a classic look, or use your favorite petal color to suit your arrangement.
Project: 5 rosesLeaves: 5Hook: 2.5 mm
Materials and Tools
- 4-ply cotton yarn in red and green.
- 2.5 mm crochet hook.
- 35 cm flower rod.
- Flexible wire, 0.5 mm in diameter.
- Needle-nose pliers, scissors, and hot glue.
Before You Begin
You will need to know how to chain, single crochet, half double crochet, double crochet, and slip stitch. Keep your tension even, with slightly looser stitches for the petals than for the sepals. Prepare five of each component before assembly.
Stitch Abbreviations (US Terms)
| Abbreviation | Meaning |
|---|---|
| CH | Chain |
| SC | Single crochet |
| HDC | Half double crochet |
| DC | Double crochet |
| SS | Slip stitch |
| DC INC | Work 2 double crochets in the same stitch |
| K1 / SK | Skip one stitch in this pattern |
| REP | Repeat the sequence |
1. Gather Your Materials

Prepare red and green cotton yarn, a 2.5 mm hook, a 35 cm flower rod, 0.5 mm wire, pliers, hot glue, and scissors.
Part 1: Crochet the Petals
2. Make a Slip Knot
Make a slip knot with red yarn.
3. Make the Foundation Chain
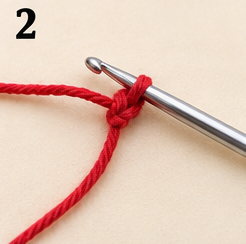
Chain 29.
4. Row 2: Form the Petal Base
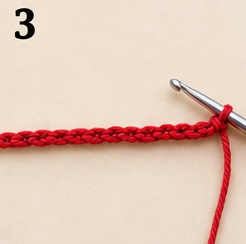
Start in the fourth chain from the hook. Following the abbreviated pattern: work 1 single crochet and 3 double crochets in the same chain, then 1 single crochet in the next chain, and skip 1 chain. Repeat the sequence along the chain, then turn.
5. Row 3: Shape the Petal Edges
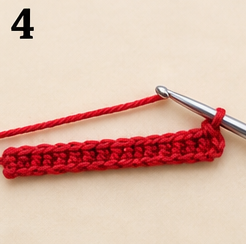
Chain 2, work 1 double crochet in the next stitch, 2 double crochets in the following stitch, and 1 double crochet in the next stitch. Chain 2 and single crochet in the next stitch. Repeat this sequence across the row, then finish with chain 1.
6. Make Five Petal Strips
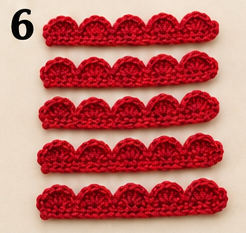
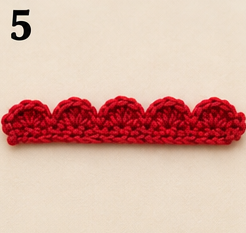
Repeat the petal instructions to make five strips. Leave yarn tails for securing your work.
Part 2: Crochet the Green Sepals
7. Make a Magic Ring
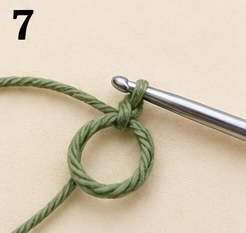
Start the sepal with green yarn and a magic ring.
8. Sepal Round 1
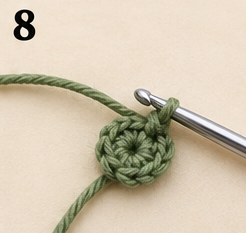
Work 5 single crochets into the magic ring. Join with a slip stitch and chain 1. Total: 5 stitches.
9. Sepal Round 2
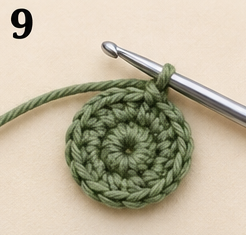
Work 2 single crochets in each stitch. Join with a slip stitch and chain 1. Total: 10 stitches.
10. Round 3: Shape the Sepal Points
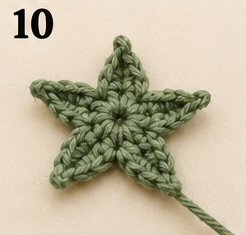
Chain 5. Working back from the second chain from the hook, work: slip stitch, slip stitch, single crochet, half double crochet. On the base of the previous round, skip 1 stitch and slip stitch into the next stitch. Repeat this sequence five times to create five points, then finish with chain 1.
11. Make Five Sepal Pieces
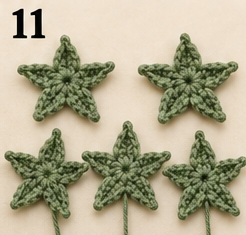
Repeat the sepal instructions to make five pieces, one for the base of each rose.
Part 3: Crochet the Leaves
12. Start the Leaf
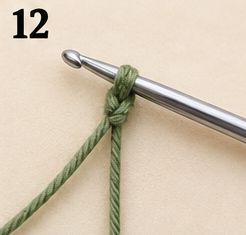
Make a slip knot with green yarn.
13. Add the Foundation Chain and Wire
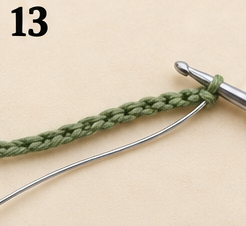
Chain 10. Place wire alongside the chain so you can enclose it as you work the stitches.
14. Shape the Leaf
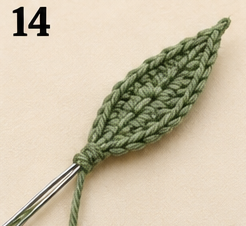
Starting in the second chain from the hook, work: 1 single crochet, 1 single crochet, 1 half double crochet, 5 double crochets, then 3 single crochets in the last chain. Continue along the other side: 5 double crochets, 1 half double crochet, 1 single crochet, 1 slip stitch, then chain 1.
15. Make Five Leaves
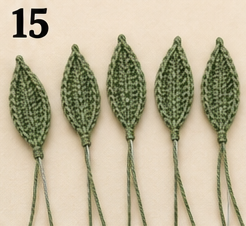
Make five leaves and leave the yarn and wire ends for assembly.
Part 4: Assemble the Roses and Branch
16. Insert the Rose Wire

Insert wire into the starting end of the petal strip.
17. Secure the Wire
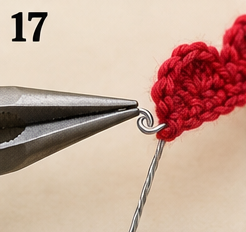
Use pliers to bend the wire end and secure it to the strip.
18. Apply a Little Glue
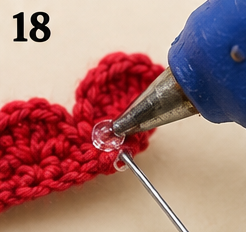
Apply a very small amount of hot glue along the lower edge of the strip.
19. Roll the Petals
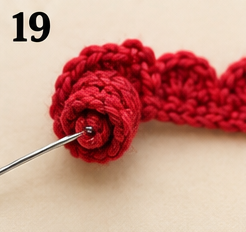
Roll the strip around the wire. Gradually loosen the roll so the rose opens naturally.
20. Secure the End
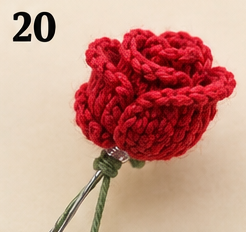
Secure the end of the strip with a small amount of glue.
21. Shape the Petals
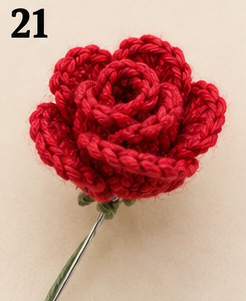
Gently open the outer layers and adjust the shape of the rose.
22. Attach the Sepal
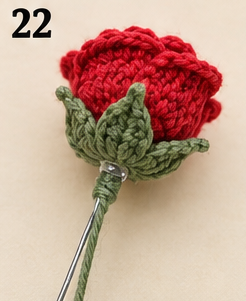
Pass the wire through the center of the sepal and glue the sepal beneath the rose, covering the end of the petal strip.
23. Wrap the Stem and Attach the Leaves
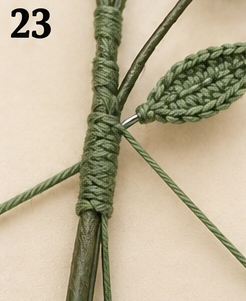
Wrap each leaf’s yarn tail around its wire. Wrap the main stem with green yarn, adding the rose and leaf wires as you go. Add a few extra wraps at the base of each rose.
24. Adjust the Finished Branch
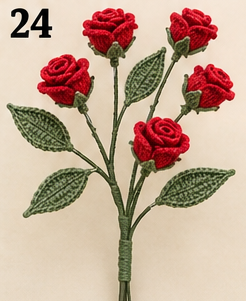
Adjust the direction of the roses and leaves. Keep the stem wrapping tight and neat. Customize the colors and number of leaves to suit your arrangement.
Assembly Tips
Keep chain tension even, petal tension slightly looser, and sepal tension a little firmer. Draw the sepal yarn tail through the first stitch of Round 2 and tie it to the magic-ring tail for a tidy finish. Use flexible wire to adjust the leaves.
Styling Your Rose Branch
Place the branch in a narrow vase, or combine several branches into a bouquet. Vary the branch heights and leaf angles for a balanced arrangement, and leave space between the roses to show their petal details.
Frequently Asked Questions
Can I change the rose color?
Yes. Choose a petal color that suits your arrangement, with green yarn for the leaves and stem.
Why do the leaves need wire?
Wire supports each leaf and lets you adjust its angle after assembly.
How can I achieve a neat finish?
Use glue sparingly, cover the wires with yarn, and hide yarn ends at the bases of the roses and leaves.
Add Your Own Finishing Touch
Once the branch is complete, arrange the leaves and gently open the petals. Save this tutorial for your next bouquet and experiment with different color combinations for each occasion.